Shopping Cart

Casting resins for rigid prototypes
Casting resin is the core of rapid prototyping. It lets you reproduce complex geometries in minutes, with a final hardness comparable to production parts. Choose the formulation based on the working time you need and the colour or finish required:
Fast-cast rigid polyurethane resins
Fast-curing polyurethane resins are the most productive option when you need to iterate on a design: they demould in 30–60 minutes, accept pigments, and can be machined, sanded and painted without difficulty. The 1:1 by volume mix simplifies the process and minimises dosing errors.
 Feropur PR55+E55
Rigid 1:1, Shore 75D, precision casting.
Feropur PR55+E55
Rigid 1:1, Shore 75D, precision casting.
 EasyFlo 60
White, 1:1, demould in 15 min.
EasyFlo 60
White, 1:1, demould in 15 min.
 EasyFlo 90
White, low viscosity, 5 min working time.
EasyFlo 90
White, low viscosity, 5 min working time.
 EasyFlo Clear
Translucent amber, ideal for pigmenting.
EasyFlo Clear
Translucent amber, ideal for pigmenting.
High dimensional precision polyurethane resins
When the prototype needs to reproduce tight tolerances or serve as a pattern for soft moulds, you need a resin with low shrinkage, high hardness and good detail reproduction. These formulations are especially suitable for engineering parts, presentation models and casting patterns.
 Axson F40 Kit de 1,2Kg
Shore 83D, low shrinkage, demould in 1 h.
Axson F40 Kit de 1,2Kg
Shore 83D, low shrinkage, demould in 1 h.
 SikaBiresin F38
Shore 72D, 2 min working time, great detail.
SikaBiresin F38
Shore 72D, 2 min working time, great detail.
 EasyFlo 120
Semi-rigid, high impact resistance.
EasyFlo 120
Semi-rigid, high impact resistance.
Tip: For prototypes that need to be black through the mass without subsequent painting, use EasyFlo Black (Shore 70D, 1:1 ratio). If the prototype needs to be white and opaque through the mass, Feropur PR55 White offers the same chemical base as the standard PR55 with built-in white pigmentation.
Epoxy resins for structural lamination
When the prototype needs to be light but strong — housings, panels, load-bearing structures — laminating with epoxy resin and fibreglass is the go-to technique. The epoxy resin impregnates the fabric, bonds the layers together and cures to form a rigid, stable and workable part.
Hand laminating epoxy resins
Hand laminating resins have a low viscosity that makes fabric impregnation easy, and long working times that let you work at a comfortable pace. They are compatible with all fibreglass fabrics in the Feroca catalogue.
 Epofer Laminate 401
Structural lamination, 90 min working time.
Epofer Laminate 401
Structural lamination, 90 min working time.
 Epofer EX401+E432
Impact-resistant epoxy casting, 90 min.
Epofer EX401+E432
Impact-resistant epoxy casting, 90 min.
 Epofer Carbon 402
Colourless with UV filter, ideal for carbon fibre.
Epofer Carbon 402
Colourless with UV filter, ideal for carbon fibre.
Reinforcement fabrics for laminated prototypes
Fibreglass fabric defines the final mechanical strength of the part. The higher the weight, the more rigidity and weight; the lower the weight, the easier it adapts to curves and the more transparent it is to gel coat. In prototyping it's common to combine a 300 g/m² mat as the structural layer with a thin surface veil that seals the surface.
Fibreglass mat and veil
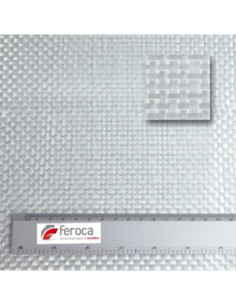
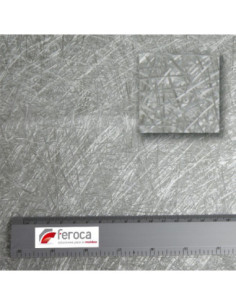 Fibra de Vidrio Mat 300 grm.
Main structural layer for laminates.
Fibra de Vidrio Mat 300 grm.
Main structural layer for laminates.
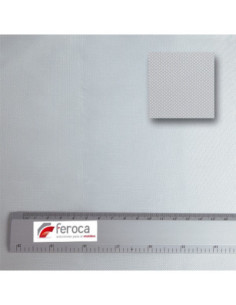
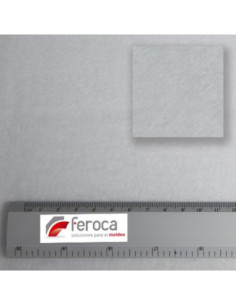 Fibra de Vidrio Velo 34 grm.
Fine finish, eliminates surface roughness.
Fibra de Vidrio Velo 34 grm.
Fine finish, eliminates surface roughness.
High-strength structural fabrics
For prototypes that require thin walls and high specific strength, woven glass fabrics are preferable to mat: they offer a higher tensile modulus per gram and allow you to orient the fibres along the load axes.
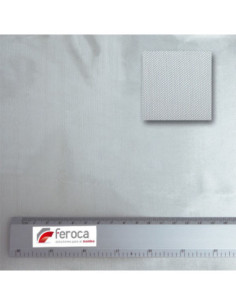 Fibra de Vidrio Tejido 48 grm.
Lightweight laminates, curves and complex geometries.
Fibra de Vidrio Tejido 48 grm.
Lightweight laminates, curves and complex geometries.
 Fibra de Vidrio Tejido 105 grm.
Balance between weight and structural strength.
Fibra de Vidrio Tejido 105 grm.
Balance between weight and structural strength.
 Fibra de Vidrio Tejido 300 grm.
High rigidity, structural load-bearing parts.
Fibra de Vidrio Tejido 300 grm.
High rigidity, structural load-bearing parts.
Putties for modelling and surface finishing
Once the base part is built, putties let you correct geometry, fill pores and imperfections, and prepare the surface for painting or for taking a silicone mould. The choice between epoxy putty and polyester putty depends mainly on the substrate and the final finish required.
Epoxy putties for dimensional corrections
Two-component epoxy putties bond to most materials — including polyurethane, metal, wood and fibreglass — without needing a primer. They are the best option when you need to add volume, correct a profile or rebuild a sculptural detail before taking the final mould.
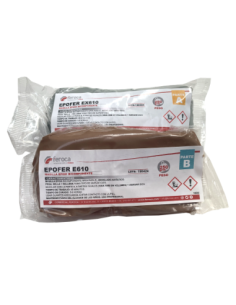 Masilla Epoxica 610
Hand-mouldable, 1:1, bonds underwater.
Masilla Epoxica 610
Hand-mouldable, 1:1, bonds underwater.
 Wood Putty - Masilla Epoxi Ligera
Lightweight, wood-like finish, 1:1 mix.
Wood Putty - Masilla Epoxi Ligera
Lightweight, wood-like finish, 1:1 mix.
Polyester putties for filling and finishing
Polyester putties are ideal for filling large imperfections and preparing surfaces before painting. They sand easily, accept direct coating and are especially practical on fibreglass laminates and metal substrates.
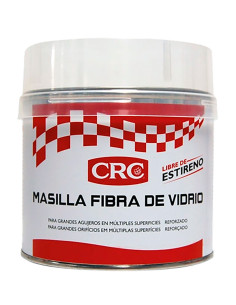 CRC Masilla de Fibra de Vidrio 1kg
Fibre-reinforced, fills large gaps.
CRC Masilla de Fibra de Vidrio 1kg
Fibre-reinforced, fills large gaps.
 CRC Masilla Celulosica - 250gr
Fine finish, perfect for details and sanding.
CRC Masilla Celulosica - 250gr
Fine finish, perfect for details and sanding.
 CRC Masilla Metálica - 1Kg
With aluminium, styrene-free, metal substrates.
CRC Masilla Metálica - 1Kg
With aluminium, styrene-free, metal substrates.
Resin comparison table for prototyping
| Product | Type | Hardness | Working time | Demould | Main use |
|---|---|---|---|---|---|
| Feropur PR55+E55 | Rigid PU | 75D | 80 s | ~30 min | Precision prototypes |
| EasyFlo 60 | Rigid PU | 65D | 2.5 min | 15-30 min | Fast production, white colour |
| EasyFlo 90 | Rigid PU | 70D | 5 min | 60-120 min | Complex geometries, low viscosity |
| EasyFlo Clear | Rigid PU | 72D | 2.5 min | 15-30 min | Pigmented or translucent parts |
| Axson F40 | Rigid PU | 83D | 6 min | 1 h | High strength, rigid moulds |
| SikaBiresin F38 | Rigid PU | 72D | 2 min | ~30 min | Scale modelling, fine detail |
| Epofer Laminate 401 | Laminating epoxy | — | 90 min | 24-48 h | Structural fibre laminates |
| Epofer EX401+E432 | Epoxy casting | — | 90 min | 48 h | Blocks and solid parts |
Frequently asked questions about prototyping
Which resin is best for a first functional prototype?
It depends on the level of detail and the time available. If you need to iterate quickly, EasyFlo 60 or Feropur PR55+E55 are the most practical options: 1:1 mix, demould in 15-30 minutes and sufficient hardness for functional testing. If the prototype needs tight tolerances and high strength, Axson F40 or SikaBiresin F38 are more suitable thanks to their low shrinkage and superior hardness.
Can I combine epoxy resin with fibreglass to reinforce a polyurethane prototype?
Yes, although the direct bond between cured polyurethane and epoxy is not chemical: it's mechanical. To achieve a solid bond, sand the polyurethane surface with 80-120 grit paper and apply the first epoxy layer with fabric impregnation before the base part has fully cooled. Epofer Laminate 401 with Mat 300 g/m² is the standard combination for reinforcing shells over PU prototypes.
Which putty should I use to prepare the surface before taking a mould?
If you need to add volume or rebuild a detail, start with Masilla Epoxica 610, which is hand-mouldable and bonds without primer. For the fine finish, move on to CRC Masilla Celulósica, which sands easily and leaves a surface ready to take a silicone mould directly, without the putty's pores interfering with the detail.
Which fibreglass fabric should I choose for a lightweight prototype with thin walls?
For thin walls and tight curves, Fibra de Vidrio Tejido 48 g/m² is the most manageable: it conforms well to the geometry and doesn't add excessive thickness. If the part needs structural rigidity, go up to 105 g/m² or combine 48 g/m² + 105 g/m² in alternating layers. Always finish with Velo de Superficie 34 g/m² to achieve a uniform finish with no fabric print-through.
Can I use polyurethane resins directly without a mould to build a prototype?
Yes, using open casting techniques in a container or perimeter box built from cardboard or polystyrene foam. Once the block has cured, you can machine, mill or sand it to get the desired shape. For this technique, EasyFlo 90 is especially suitable thanks to its low viscosity and 5-minute working time, which lets you pour successive layers without visible join lines appearing.
Do I need release agent with polyurethane resins?
Yes, always. Polyurethane resins bond strongly to most surfaces, including other polyurethane parts. Always apply a release agent — wax, PVA or spray release — to the mould before casting. The only exception is when you use platinum silicone moulds, which have intrinsic non-stick properties against polyurethane.