Shopping Cart


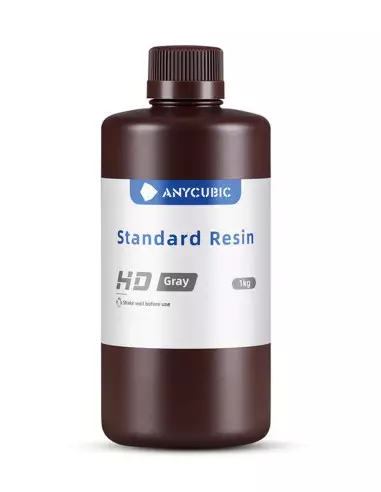
Anycubic Standard HD Gray -Resin 3D-
220600100
€22.00
26,62 € Tax incl.
26,62 € Tax incl.
HD matte grey photopolymer resin for 4K–8K LCD/DLP printers. Accuracy ±0.02 mm, curing at 365–405 nm, minimal shrinkage. Ideal for miniatures and prototypes.
The Anycubic Standard HD Gray is a high-definition photopolymer resin formulated for LCD and DLP printers with a wavelength between 365 and 405 nm. Its dark matte grey tone highlights edges and micro-details while minimising the visibility of layer lines, making it a solid choice for miniatures, prototypes and parts that demand maximum resolution. Low viscosity, minimal shrinkage and broad compatibility with 4K and 8K equipment make it versatile in any resin printing workshop.
Technical specifications
| Parameter | Value |
|---|---|
| Type | LCD/DLP photopolymer resin |
| Colour | Dark matte grey (Matte Dark Gray) |
| Compatible resolution | 4K – 8K |
| Curing wavelength | 365 – 405 nm |
| Dimensional accuracy | ±0.02 mm |
| Recommended layer thickness | 0.02 – 0.1 mm |
| Exposure time (normal layers) | 1.5 – 2.5 s (at 0.05 mm) |
| Initial exposure time (bottom layers) | 18 – 25 s |
| Recommended post-cure | 2 – 3 min at 405 nm |
| Viscosity | Low |
| Dimensional shrinkage | Minimal |
| Compatibility | LCD/DLP printers and Photon series |
What it is used for
The Anycubic HD Gray is aimed at applications where surface detail and dimensional fidelity are the top priority. The matte grey works as a neutral working tone: it makes visual inspection of complex geometries easier under any lighting and serves as a base for subsequent painting without the need for aggressive priming.
- High-resolution role-playing game and wargame miniatures
- Collectible figures and digital sculptures
- Architectural scale models with fine details
- Functional prototypes of mechanical parts
- Masters for silicone or polyurethane moulds
- Study models and product presentation pieces
- Hobby and scale modelling parts where every millimetre counts
How to use it
- Shake the bottle for at least 30 seconds before pouring. Pigments tend to settle over time and a homogeneous mix is key for colour consistency and curing.
- Pour the resin into the vat of the printer. Do not fill above the maximum marked level; working with less volume makes subsequent cleaning easier.
- Configure the print parameters: layer thickness between 0.02 and 0.1 mm, normal exposure of 1.5–2.5 s and initial exposure (bottom layers) of 18–25 s. Adjust according to your specific machine.
- Start the print and monitor the first layers to ensure adhesion to the build plate is correct.
- Remove the part with a spatula and gloves. Remove supports before post-curing if they are easy to access while the part is still green (not fully cured).
- Wash the part with isopropyl alcohol (IPA) at 95% or in a dedicated resin washer for 3–5 minutes. Remove all traces of liquid resin from the surface.
- Post-cure under UV light at 405 nm for 2–3 minutes. Do not exceed the time: overexposure makes the part brittle.
- Inspect and finish: sand, prime or paint according to the final use. The matte grey is an excellent starting point for finishing with acrylics or enamels.
Caution: Uncured photopolymer resin is irritating to skin and eyes and may cause contact sensitisation. Always work with nitrile gloves, safety glasses and in a well-ventilated space. Do not pour uncured resin down the drain; treat waste as hazardous material. Keep the bottle away from UV light sources and heat. In case of skin contact, wash with soap and water; in case of eye contact, rinse thoroughly with water and consult a doctor.
Usage tips
Parameter calibration for your printer
The exposure times given are starting values, not absolute values. The actual power of the light source varies depending on the printer model, screen wear and FEP-to-screen distance. If you see delaminated layers or poor adhesion, increase the initial exposure time in increments of 2 s. If the part is overexposed (loss of detail in fine recesses), reduce the normal time by 0.2–0.3 s. Print an exposure calibration test (such as an exposure matrix) before starting a long run.
Storage and bottle maintenance
Store the resin in its original container tightly closed, in a cool place (15–25 °C) and away from direct sunlight or fluorescent light. If you have poured resin into the vat and are not going to print again that day, filter it back into the bottle using a fine-mesh strainer to remove any partially cured particles. Do not mix resins from different manufacturers in the same bottle: the formulations may be incompatible and cause deposits or curing inhibition.
Preparation for subsequent moulding
If you use HD Gray printed parts as masters for silicone moulds, make sure the post-cure is complete before pouring the silicone. Incompletely cured resin can inhibit the curing of platinum (addition) silicones. Apply a thin coat of release agent spray or seal the part with a water-based varnish to isolate any surface residue. For faithful reproduction, a well-finished part sanded from 400 grit upwards will give better results than straight off the printer.
Frequently asked questions
What type of printer do I need to use this resin?
The Anycubic Standard HD Gray is compatible with any LCD or DLP resin printer that operates at a wavelength between 365 and 405 nm. This includes most current-market machines with a monochromatic 4K and 8K screen. The Anycubic Photon series is especially compatible, but it works without issue on other mid-to-high-range LCD brands.
What liquid is used to clean the part after printing?
The most common method is isopropyl alcohol (IPA) at 95% or higher. Submerge the part for 3 to 5 minutes, agitate or use ultrasound, and air-dry before post-curing. You can also use dedicated resin washers with an IPA tank. Avoid excessively long wash times as IPA can embrittle thin-walled parts.
How long should the post-cure last?
With the Anycubic Standard HD Gray, 2 to 3 minutes at 405 nm in a UV post-curing station is recommended. A shorter time may leave the part slightly tacky and with mechanical properties below optimum. Excessive time causes over-curing: the part becomes more rigid and brittle. If you do not have a UV station, exposure to direct sunlight for 10–15 minutes in summer may be sufficient, although results are less consistent.
Can I use this resin as a master for making a silicone mould?
Yes, but with precautions. Correctly cured resin is stable and suitable as a master. If you are using platinum (addition) silicone, make sure the part is fully post-cured and, as an extra safety measure, apply a coat of water-based varnish or release agent before pouring the silicone. Partially cured resin can inhibit the curing of platinum silicones. With tin (condensation) silicones this risk is lower.
Why is matte grey better than white or black for seeing details?
Neutral matte grey captures side light without overexposing highlight areas or losing detail in shadows, unlike white (which overexposes) or black (which flattens relief). For inspecting complex geometries, comparing against a digital model or photographing for presentations, grey is the reference tone in the prototyping and miniatures sector.
Can the printed part be painted directly?
Yes. Once washed and post-cured, the part accepts acrylic paints, enamels and sprays. For best results, lightly sand with 400–800 grit to remove residual layer lines and apply a coat of primer before painting. The matte grey tone of the resin already acts as a neutral base, so a thin primer coat is sufficient before applying the final colour.
What do I do if the resin does not adhere to the build plate?
Adhesion problems are usually caused by three things: incorrect build plate calibration (FEP distance too large), insufficient initial exposure time or poorly shaken resin. First check that the build plate is properly levelled and at the correct distance from the FEP. Then increase the initial exposure time in increments of 2–3 seconds until you achieve consistent adhesion. Always shake the bottle before pouring.
How do I eliminate the smell during printing?
Photopolymer resins emit volatile organic compounds during printing. Always work in a ventilated space or use an air purifier with an active carbon filter near the printer. Keep the printer cover closed during the process to limit vapour dispersal. Store leftover resin in the closed bottle and do not leave the vat uncovered for longer than necessary.
No reviews
Tap to zoom