Shopping Cart
- Cosplay
- 0 likes
- 2395 views
- 0 comments
Latex is the material for elements that cannot be rigid. When you need a mask that flexes with your expression, horns that survive a hug at a convention, or claws that hold up for eight hours without breaking, latex is the right answer. Unlike foam or Worbla, it forms a flexible skin that mimics the feel of natural rubber and retains mould detail with a precision no other material can match.
This guide covers everything you need to know to work with latex in cosplay: what products are available, how many layers you need, how to paint it without cracking, and which complementary products extend the life of your pieces.
Why latex works for cosplay
The key property of latex is its elasticity: it can bend one hundred percent and return to its original shape without deforming or cracking. That makes it the only suitable material for pieces that go over mobile areas of the body — the face, hands, elbows — or that need to withstand continuous physical contact.
On top of that, it reproduces mould detail faithfully. Every wrinkle in the sculpture, every skin texture, every sharp edge is captured in the first layer. The result is a piece that looks like it's made of real skin, not plastic.
The downside is that it works over a mould: you can't build with latex directly by hand the way you can with EVA foam or EVA AIR. You need a prior sculpture — in clay, plaster, or silicone — over which to apply the layers.
ProMask Látex: the go-to material for cosplay masks
The ProMask Látex is a brushable latex designed specifically for cosplay and special-effects masks and props. It's applied with a brush directly over the mould, layer by layer, and air-dries without needing an oven or any special treatment.
What sets it apart for cosplay:
- Four available colours — natural, white, flesh, and black. Starting from the right colour cuts in half the paint layers needed to reach the character's final tone.
- Low viscosity — similar to milk, which allows the first layer to get into all the mould's details without leaving bubbles.
- Fast drying — under normal conditions each layer dries in 20–30 minutes, allowing you to work multiple layers in a single session.
- High elasticity — once demoulded, the piece can bend completely without breaking.
How many layers you need
The thickness of the finished piece determines its strength and lifespan. As a reference:
| Use | Recommended layers | Approximate thickness |
|---|---|---|
| Half-face mask, occasional use | 6–8 layers | ~2–3 mm |
| Full mask, entire convention | 10–14 layers | ~4–5 mm |
| Flexible horns and ears | 8–10 layers | ~3–4 mm |
| Claws and creature gloves | 10–12 layers | ~4 mm |
| Soft props (weapons, accessories) | 6–8 layers | ~2–3 mm |
The practical rule: each layer must be dry before applying the next. The first two layers are the most important — they capture the mould detail — and should be thin. The middle layers can be slightly thicker to build up body. Reinforce with additional layers at the edges and in areas of tension (jaw hinges, joints).
Látex Líquido para Moldes: when you need more volume
The Látex Líquido para Moldes is a higher-viscosity alternative useful for pieces that need more body, or for when ProMask falls short in thickness. It also works by casting — you fill the mould, let it sit for ten minutes, and empty it — which speeds up the process for hollow pieces.
The practical difference between ProMask and Látex Líquido para Moldes:
| Feature | ProMask Látex | Látex Líquido para Moldes |
|---|---|---|
| Application method | Brush (layer by layer) | Brush or casting |
| Viscosity | Low (like milk) | Medium |
| Available colours | 4 (natural, white, flesh, black) | Natural |
| Ideal for | Masks, detailed props | Hollow pieces, mould liners |
| Level of detail | Very high | High |
For character masks with facial detail, ProMask is the first choice. Látex Líquido para Moldes comes into play when you're building simpler props or when you want to make quick copies in plaster moulds using the casting method.
How to paint latex without it cracking
The biggest mistake when finishing latex pieces is using standard acrylic paint directly. Standard acrylic paint is not elastic: as soon as the piece bends, the paint cracks and peels. The result becomes obvious within ten minutes of putting the mask on.
The solution is Monster Makers Mask Paint: concentrated paints specifically formulated for rubber surfaces. They have the same elasticity as latex — they flex with the piece without cracking — and the colours mix with each other to achieve any skin tone, creature colour, or fantasy shade.
How to apply them:
- Make sure the latex is fully cured and demoulded.
- Wipe the surface with a dry cloth to remove any release agent dust.
- Apply Mask Paint diluted 20–30% with water in thin layers. The first layer is the base coat.
- Allow to dry between layers (5–10 minutes).
- For shadows and effects, stipple with a sponge rather than brushing.
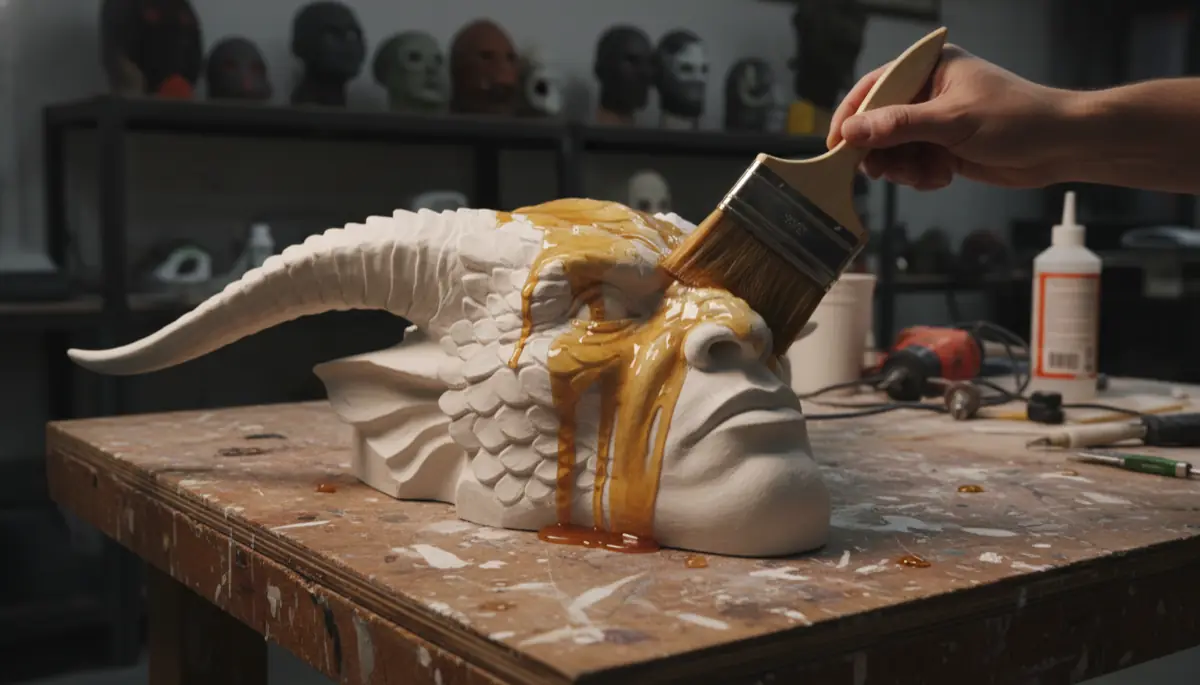
- Seal the finish with Flex Gloss if you want a glossy result, or leave unsealed for a matte finish.
For airbrush effects, Mask Paint is compatible with external-mix airbrushes — the preferred method among SFX artists for skin gradients and shadows.
Flexible props: horns, elvish ears, and claws
Latex isn't just for masks. Any cosplay element that needs to be flexible and withstand knocks is a candidate for latex:
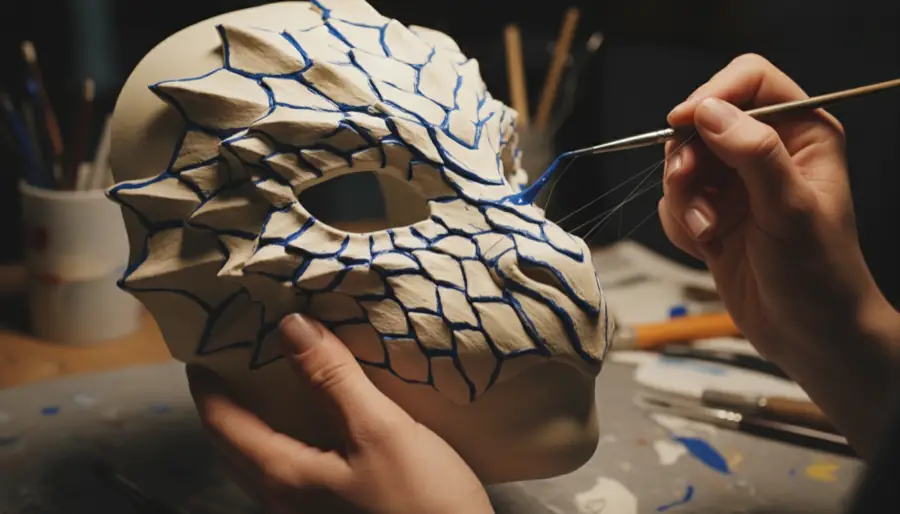
Horns and antlers — built over a wire or hard foam core, then coated with layers of ProMask until the desired thickness is achieved. The result is a horn that won't break if someone touches it, and that can flex slightly without being damaged.
Elvish and character ears — created in a plaster mould from a lifecast of a real ear or from a sculpture. With 8–10 layers of flesh-coloured ProMask you get a piece that, once painted, looks like skin.
Claws and creature gloves — latex is applied over a thin latex glove that acts as a base. Foam or clay extensions are added for the claws, covered with more layers, and the whole thing is painted as a single piece.
Soft props — shields, weapons, accessories that need to give on impact. The shape is built in EVA foam and coated with 6–8 layers of latex, giving a flexible, durable outer shell without losing the base shape.
Permatex: how to increase latex durability
Natural latex has one weak point: UV degradation. Under normal use and storage conditions, a latex mask starts to lose elasticity and yellow after one or two years.
Permatex is a liquid additive that is mixed with ProMask before application (dosage 100:2 by weight). It increases resistance to ageing, protects against UV radiation, and reduces cracking from prolonged use.
For one-off conventions, ProMask without additives is sufficient. For pieces that will be used over several seasons — performance masks, recurring-use props, collections you want to preserve — adding Permatex from the very first layer is the right investment.
Safety notice
Liquid latex contains ammonia and is not suitable for direct contact with skin. Always work in a well-ventilated space, and wear nitrile gloves and a mask during application. Once fully cured, the piece is safe to wear.
If you have a latex allergy, none of the products in this family are suitable for contact with your skin.
Frequently asked questions about latex for cosplay
Can latex be applied directly onto skin for cosplay?
No. ProMask and Látex Líquido para Moldes are not suitable for direct contact with human skin in liquid form — they contain ammonia. For prosthetics adhered to skin (scars, ears, horns), the correct material is platinum silicone EasyGel FX, which is SFX-grade and skin-safe. Latex only goes over a mould, not directly onto the body.
How long does each layer of ProMask take to dry?
Under normal temperature conditions (20–22 °C) and average humidity, each layer dries in 20–30 minutes. With a hair dryer on a low setting you can speed up the process to 10–15 minutes per layer. Don't apply excessive heat — latex can deform if it gets too hot before it's fully cured.
Can ProMask be pigmented before application?
Yes. Titantex pigments for latex are added directly to ProMask and mixed until the desired colour is achieved. Bear in mind that latex lightens as it dries, so the wet colour is always more intense than the final result. Always do a test on paper before applying to the mould.
How many litres of latex do I need for a full mask?
For a full-face mask with 10–12 layers, you'll need between 300 and 500 ml of ProMask depending on the size of the mould and the thickness of each layer. For horns or ears, 100–200 ml is sufficient. ProMask is available in 1, 5, and 25-litre formats.
Can latex be repaired if it tears?
Yes. A crack or tear in a latex piece can be repaired by applying one or two additional layers of ProMask over the damaged area with a fine brush. Allow to dry completely and repaint if necessary. For larger repairs, Flexifill latex filler allows you to fill gaps and restore the surface.
How long does a well-preserved latex mask last?
Without additives, between one and three years depending on storage conditions. Store pieces away from direct light, in a plastic bag with no contact with sticky surfaces, and at a stable temperature. With Permatex incorporated from the start, the useful life is extended considerably.
Explore latex materials at Feroca
All the products in this guide are available in the SFX latex section and in the latex accessories section.
For more complex projects combining latex with silicone moulds, also check out:
Comments (0)