Shopping Cart

Triangular EVA profile 1 meter
208262010
€4.00
4,84 € Tax incl.
4,84 € Tax incl.
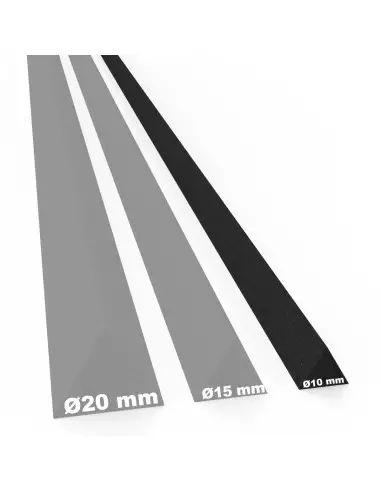
Prefabricated triangular EVA profile, 1 m, for edges, panelling and frames in cosplay. Available in 10, 15 and 20 mm. Thermoformable and lightweight.
The Triangular EVA Profile is a prefabricated EVA foam moulding with a 45° bevel cross-section designed to add clean edges, frames and panelling to any EVA base without having to carve from scratch. Supplied in 1-metre lengths and available in three cross-sections, it is the fastest way to achieve symmetry and uniformity in armatures, helmets and cosplay or theatre props.
Technical specifications
| Parameter | Value |
|---|---|
| Material | EVA Foam (Ethylene Vinyl Acetate) |
| Profile | Triangular (45° bevel) |
| Length per unit | 1 metre |
| Available cross-sections | 10 mm, 15 mm, 20 mm |
| Indicative hardness | 30–35 Shore A |
| Thermoformable | Yes, with a heat gun at low temperature |
| Machinable | Yes: craft knife, saw, sandpaper, rotary tool |
| Recommended adhesive | Contact cement |
| Colour | Grey |
What it is used for
The triangular profile creates precise, uniform edges in a single pass. It is the most common resource in cosplay workshops and prop-making for any detail that requires a repeatable 45° line along an entire piece, whether a fantasy Armature, a sci-fi helmet or a prop for theatre and audiovisual production.
- Edges and frames on fantasy and sci-fi armatures
- Panelling and "tech" design lines on helmets, chest plates and shoulder guards
- Visual separations between sections of the same piece
- Perimeter trims on shields, pauldrons and greaves
- Relief details on props: casings, control panels and guards
- Visual reinforcement of edges and transitions between sheets of FRC FOAM 2 mm, 5 mm or 10 mm
- Decorative structural ribs on capes and stage accessories
How to use it
- Plan your layout: mark with a marker or masking tape the line on the EVA base piece where the profile will go.
- Cut to size: use a sharp craft knife with a metal guide or EVA scissors to get the exact length. For angles and corners, make 45° mitre cuts.
- Thermoform if needed: for gentle curves, heat the profile with a heat gun at low temperature for 2–3 seconds and shape it with your hands wearing gloves. Hold the shape until it cools.
- Prepare the surfaces: make sure both the profile and the base are clean, dry and free of dust.
- Apply the contact cement: apply a thin coat to both contact surfaces. Wait the flash time indicated by the adhesive (usually 2–5 minutes) until it loses its wet sheen.
- Bond and press: position the profile carefully, as the bond is immediate. Press firmly along the entire length for 30–60 seconds.
- Tidy the ends: sand the ends and edges with fine-grit sandpaper to integrate the profile into the piece without visible steps.
- Paint and finish: apply the usual EVA primer and paint. The profile accepts the same finishes as the rest of the piece.
Tips and tricks
Angled cuts for perfect corners
When you need to go around an outer 90° corner, make two facing 45° mitre cuts at the ends of each run. A pair of set squares or a simple cutting guide ensures repeatability if you have several identical corners. For inner corners a straight cut is enough: the compression of the material naturally closes the angle when glued.
Integration with FRC FOAM sheets
The triangular EVA profile is designed to work on bases of FRC FOAM 2 mm, 5 mm and 10 mm. For a completely flush finish, slightly recess the area of the base sheet where the profile will sit using a rotary tool or coarse sandpaper before gluing. This way the outer edge of the profile sits flush with the sheet without creating a step.
Finishing and painting
For a high-quality gloss or metallic finish, seal the entire surface (sheet + profiles) with a flexible EVA primer before painting. This prevents the paint from cracking when the piece is bent. If you want rougher or more metallic textures, light sanding with 120-grit sandpaper before priming improves the adhesion of pigmented finishes.
Frequently asked questions
Which profile size should I choose for each type of piece?
The 10 mm size is ideal for small details and fine panelling on pieces up to 20–30 cm, such as gauntlets or greaves. The 15 mm fits well on medium-sized pieces like shoulder guards or bracers. The 20 mm has more visual presence and is most commonly used on large pieces like chest plates, shields or helmets where a strong contrast is desired. On a single piece you can combine sizes to create visual hierarchy.
Which adhesive bonds EVA foam best?
Contact cement is the go-to adhesive for bonding EVA profiles to EVA bases. Apply it to both faces, allow the solvent to evaporate (until the layer loses its sheen) and press the surfaces together firmly. The bond is immediate and very strong. Avoid water-based adhesives on untreated EVA, as adhesion is inferior.
Can it be painted directly without primer?
Technically yes, but it is not recommended. EVA foam is porous and elastic, and paint without a flexible primer will tend to crack when the piece is bent or compressed. Applying an EVA-specific primer or a flexible sealer before painting ensures even coverage, better adhesion and a durable finish.
Can it be sanded and touched up once glued?
Yes. Once the adhesive is dry, you can sand the edges and transitions with fine-grit sandpaper (120–180) to smooth out steps or adjust the shape. You can also use a rotary tool with a sanding attachment for more precise touch-ups. EVA handles machining well as long as too much heat is not applied to a single spot.
How much heat does it need to thermoform?
With a heat gun at low or medium temperature (approximately 80–120 °C at about 10 cm distance) just 2–4 seconds of heat is enough for the profile to soften sufficiently to bend it. Do not overheat: EVA can deform in an uncontrolled way or develop surface bubbles if exposed to heat for too long. Work in short sections and advance progressively.
Is it compatible with EVA sheets of other densities?
Yes. The triangular EVA profile bonds without issues to any EVA foam sheet regardless of its density, including FRC FOAM high-density sheets. That said, the greater the hardness difference between the profile and the base, the more visible the transition will be when the piece is bent. For pieces that require flexibility, use EVA bases with a hardness similar to that of the profile.
Can it be cut diagonally or in a curve?
For straight and angled cuts, a sharp craft knife with a metal guide is the most precise tool. For open, gentle curves, the combination of heat and manual bending gives excellent results without needing to cut. For tight curves or organic shapes, it is preferable to cut the profile into short segments that adapt to the desired radius and glue them in sequence, sealing the joints with heat or adhesive.
How many units are needed for a complete armature?
It depends on the level of detail and the size of the piece. As a rough guide, a chest plate with medium panelling uses between 3 and 6 metres of profile in various sizes. A full armature (chest plate, back plate, shoulder guards, bracers, gauntlets, thighs and greaves) may require between 15 and 30 metres in total. Planning the design on paper before buying the material avoids running short or accumulating excess.
No reviews
Tap to zoom