
Shopping Cart
- Feroca
- Epoxy Resins
- 0 likes
- 335 views
- 0 comments
Making your own resin dice is one of the most rewarding projects for anyone who plays role-playing or board games: you can copy your favourite dice, invent colours you won't find in any shop and add shimmer, swirls or inclusions inside. But dice have a requirement no other resin piece has: they must come out clear, bubble-free and with perfectly flat faces. In this guide we walk you through the whole process, from the silicone mould to the final polish, with the timing of every step.
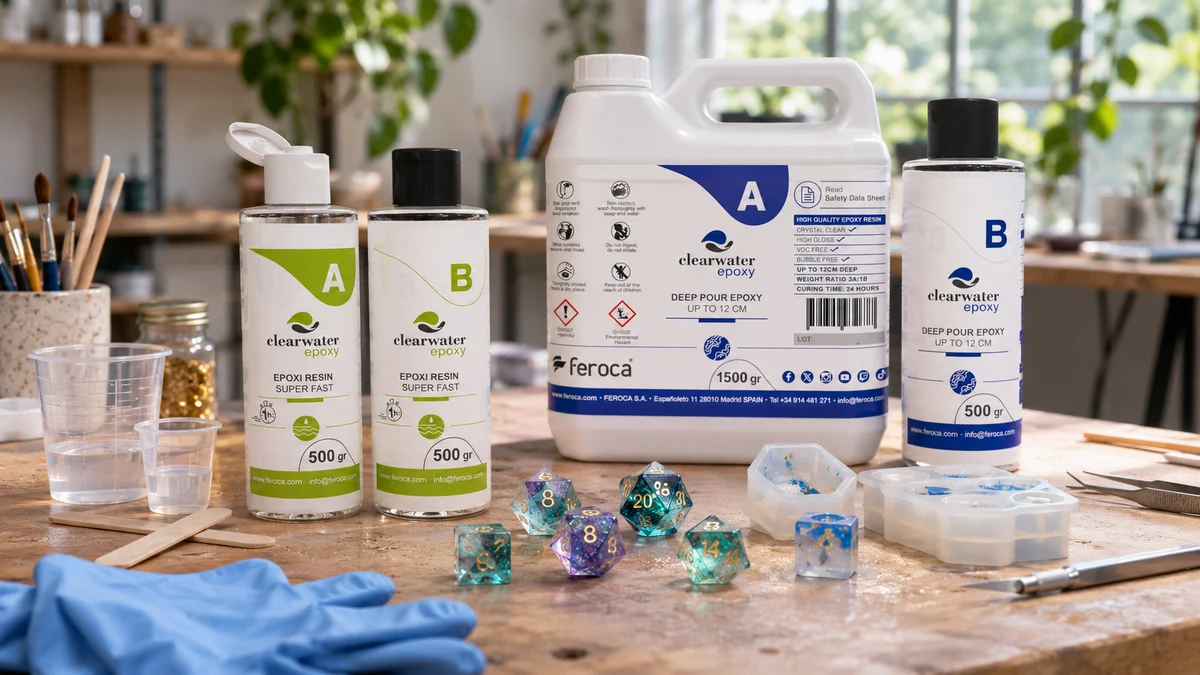
What you need
| Stage | Material |
|---|---|
| Mould | PlatSil 73-20 platinum silicone |
| Release agent | ACMOS 82-2405, wax-based spray release agent |
| Resin | ClearWater Epoxy Super Fast for standard-size dice and ClearWater Deep Pour for large dice |
| Colour | UltraColor translucent pigments, Piñata alcohol inks and Pearl Ex powder pigments (metallic and pearlescent) |
| Bubbles | Complete vacuum system (pump and chamber) or the SV-26P professional system |
| Polishing | Wet sandpaper in progressive grits and PolarShine 35, PolarShine 10 and PolarShine 5 polishing pastes |
| Tools | Precision scale, mixing cups, wooden spatulas and nitrile gloves |
Which resin to choose
| ClearWater Epoxy Super Fast | ClearWater Deep Pour | |
|---|---|---|
| For | Standard-size dice | Large dice |
| Mix ratio | 100A:100B (equal parts) | 100A:33B by weight |
| Working time (25 °C) | 15 minutes | 40 minutes |
| Cure (25 °C) | 1-2 hours | 24 hours |
| Hardness | Shore 80D | Shore 80D |
Super Fast is the most practical choice for standard-size dice: it cures in 1-2 hours, so you can cast several batches in a single day. The trade-off is that it only gives you 15 minutes of working time, so have everything ready before you mix. For large dice, Deep Pour is designed for thick pours, generates very little heat as it cures and gives you 40 minutes of working time, plenty to colour and degas calmly. Both have high UV resistance, so your dice won't yellow over time.
The silicone mould
1. Prepare the master
You can use a die you already own or one you have sculpted yourself as the master. Glue it by one face to a small pedestal (a plastic cylinder or a piece of firm modelling clay about 1 cm high): that pedestal will become the opening through which you pour the resin. Then glue the pedestal to the bottom of a small mould box, leaving about 5-10 mm between the die and the walls.
Platinum silicone can be inhibited by sulphur, amines, tin compounds, cured polyester and some paints: in contact with them it stays tacky and does not cure. If your master is made of a doubtful material (a painted die, a resin 3D print), test a little silicone on a hidden area first.
2. Mix, degas and pour the PlatSil 73-20
PlatSil 73-20 is mixed in equal parts (1A:1B), by weight or by volume. It is a translucent blue silicone, Shore A22, with negligible shrinkage, so the mould copies the edges and numbers of the die with full precision. Its working time is only 5 minutes, so get organised:
- Mix both parts for one minute, scraping the bottom and sides of the cup well.
- Place the cup in the chamber of the vacuum system. The silicone will rise as the vacuum builds: use a cup at least three or four times the volume of the mix so it doesn't overflow. When it rises and falls back, release the vacuum.
- Pour in a thin stream into one corner of the box, not over the die, until it is covered by at least 1 cm of silicone.
PlatSil 73-20 cures in 1 hour. Because it is translucent, you can see the die through it: make a zigzag cut along one side to remove it, and the zigzag will make both halves always line up in the same position. If you prefer a two-part mould, the process is in our guide to making a two-part silicone mould.
3. Apply the release agent
Before each pour, shake the ACMOS 82-2405 can well and spray the inside of the mould with a single quick, even pass from 20-30 cm away. It is a silicone-free wax release agent, suitable for epoxy resins, and it extends the life of the mould.
Casting the resin
4. Mix and colour the resin
Weigh the resin on the scale: equal parts for Super Fast and 100A:33B by weight for Deep Pour. Mix slowly for 2-3 minutes, without whipping. Then add the colour:
- Transparent colour, the classic crystal dice look: a few drops of UltraColor. A very small amount already tints the resin, and the more you add, the stronger the shade; start with little, because if you overdo it the die stops being transparent.
- Metallic and pearlescent: a pinch of Pearl Ex powder pigment for a metallic or pearly shimmer inside the die. A very small amount already shines; if you add too much, the die loses its transparency.
- Swirls, smoke and galaxy effects: a few drops of Piñata alcohol ink, which is also UV resistant. To keep the swirl from blurring, add it last and stir only a couple of turns, or drop it straight onto the resin once it is in the mould.
5. Degas and pour
Place the cup of coloured resin in the vacuum chamber for a few minutes, until bubbles stop rising to the surface. With Super Fast, keep an eye on the clock: you have 15 minutes of working time in total from the moment you mix. Then pour the resin slowly through the pedestal opening until the mould is full and slightly overfilled: that small excess is sanded off later.
6. Cure and demould
Let it cure at a constant temperature: Super Fast in 1-2 hours at 25 °C and Deep Pour in 24 hours. According to their data sheets, a sudden change in temperature can make the resin cure unevenly or more slowly. Once cured, open the mould along the cut and remove the die.
Sanding and polishing
The data sheets of both resins recommend leaving the pieces for a few days before machining them, so wait before sanding. Then:
- Remove the pour residue. Cut off the leftover pedestal and sand that face on wet sandpaper laid on a flat surface, in figure-of-eight movements, until it is completely flat.
- Sand progressively. Move up through the grits, from coarse to fine, keeping the paper wet, until the face has no visible scratches.
- Polish. First with the coarse PolarShine 35 paste, then with the fine PolarShine 10 and finally with PolarShine 5 for the final gloss. You can work them by hand, with a cloth, or by machine.
- Ink the numbers. If your die has engraved numbers, fill them with paint, wipe the excess off the surface with a cloth before it dries and leave to dry.
Timing summary
| Step | Time |
|---|---|
| PlatSil 73-20 working time | 5 minutes |
| Mould cure | 1 hour |
| Resin working time | 15 minutes (Super Fast) / 40 minutes (Deep Pour) |
| Resin cure | 1-2 hours (Super Fast) / 24 hours (Deep Pour) |
| Wait before sanding and polishing | A few days |
Common mistakes
| Problem | Cause | Solution |
|---|---|---|
| Bubbles in the corners of the die | Air trapped in the silicone or the resin | Degas both the silicone and the resin in the vacuum chamber |
| The silicone doesn't cure next to the die | Inhibition caused by the master's material | Do the test first or seal the master before making the mould |
| The resin thickens before pouring | The 15 minutes of Super Fast have run out | Have the mould and pigments ready before mixing, or use Deep Pour |
| The die comes out cloudy | Too much pigment or ink | Use very little UltraColor and just a few drops of Piñata |
| Slanted face after sanding | Sanding on a soft surface or pressing on one side | Lay the sandpaper on glass or a hard, flat surface and press in the centre of the die |
Frequently asked questions
Which resin is best for making dice?
For standard-size dice, ClearWater Epoxy Super Fast, which cures in 1-2 hours. For large dice, ClearWater Deep Pour, designed for thick pours and with 40 minutes of working time.
Which silicone should I use for dice moulds?
A platinum silicone with negligible shrinkage, such as PlatSil 73-20: it copies edges and numbers precisely, cures in 1 hour and, being translucent, lets you see the die to cut the mould.
How do I avoid bubbles in resin dice?
By degassing both the mould silicone and the resin in a vacuum chamber before pouring. A vacuum system with a pump and chamber removes the air from the mix before it starts to cure.
How long does it take for a resin die to be ready?
With Super Fast, the die can be demoulded in 1-2 hours; with Deep Pour, in 24 hours. Before sanding and polishing it, wait a few more days, as the data sheets of both resins recommend.
How do you colour resin dice?
With translucent pigments such as UltraColor for a transparent colour, and with Piñata alcohol inks for swirls and effects, and with Pearl Ex powder pigments for a metallic or pearly shimmer. Use small amounts of all of them so the die doesn't lose its transparency.
How do you polish resin dice?
First sand the pour face on a flat surface, moving up through the grits progressively, then polish with pastes from coarse to fine: PolarShine 35, PolarShine 10 and PolarShine 5.
Comments (0)