
Shopping Cart
- Feroca
- Cosplay
- 0 likes
- 1570 views
- 0 comments
One of the most frustrating moments when building a cosplay armour is watching a Worbla or EVA foam plate crack right at the elbow, knee or shoulder the first time you move while wearing it. The problem isn't the material — it's that these rigid pieces aren't designed to flex at a single point without reinforcement. The solution is to build a real hinge into the armour itself: a transition zone that moves with your body instead of resisting it. In this guide we explain three ways to do it with materials you already have in the workshop.
Why rigid armour needs articulation points
A hinge in cosplay is the part of an armour that replaces a continuous rigid plate with a flexible material or a pivoting mechanism, so the piece follows the real movement of a body joint instead of breaking at it. Worbla and EVA foam are excellent for shaping and stiffening chest plates, pauldrons or vambraces, but both behave like a solid sheet: if you cover an elbow or a knee with one continuous plate, the very first real flex creates a crack right along the line of maximum stress.
The points that need it most are those with the greatest real range of motion: the elbow (flexes up to 145°), the knee (up to 135°), the shoulder on pauldrons, and articulated props like fingers or helmet jaws. Without a hinge, besides the risk of breakage, the armour becomes uncomfortable to wear during the 6-8 hours a convention day usually lasts.
Living hinge: in cosplay this refers to the transition zone where, instead of a single rigid plate, you combine a flexible material (fabric, thin EVA foam) or a mechanical element (floating rivet) that allows rotation without the rigid Worbla or EVA ever touching or fracturing at the point of maximum flex.
Three ways to build a working hinge
There's no single correct technique: the one you choose depends on whether you need maximum invisibility, more cushioning against the skin, or a purely mechanical pivot like a door hinge.
| Technique | Best for | Visibility |
|---|---|---|
| Fabric-sandwich hinge | Elbows, knees, two-piece vambraces | Hidden under paint or matching fabric |
| Thin EVA foam hinge | Areas in direct contact with skin | Paints exactly like the rest of the piece |
| Floating rivet with vinyl tubing | Fingers, helmet jaws, pure rotation | Visible, can become a design feature |
Materials you'll need
| Product | What it's for |
|---|---|
| Worbla's Finest Art / Worbla's Black Art | Rigid plates on either side of the hinge |
| Worbla's Meshed Art | Reinforcement of the stress point, resists tearing better |
| Thick, non-stretch fabric (canvas, drill or fusible interfacing) | Sandwich hinge under the Worbla |
| FRC FOAM 2 mm | Flexible hinge in areas that touch the skin |
| EVA Contact Pro | Gluing EVA layers while keeping flexibility after drying |
| PERMABOND 2050 Semi-Flexible Cyanoacrylate | Quick fixing of specific spots that will keep moving |
| EVA AIR Foam Clay | Disguising the join between the hinge and the rest of the plate |
| Magnetic Brackets | Alternative when the piece needs to fully separate, not just pivot |
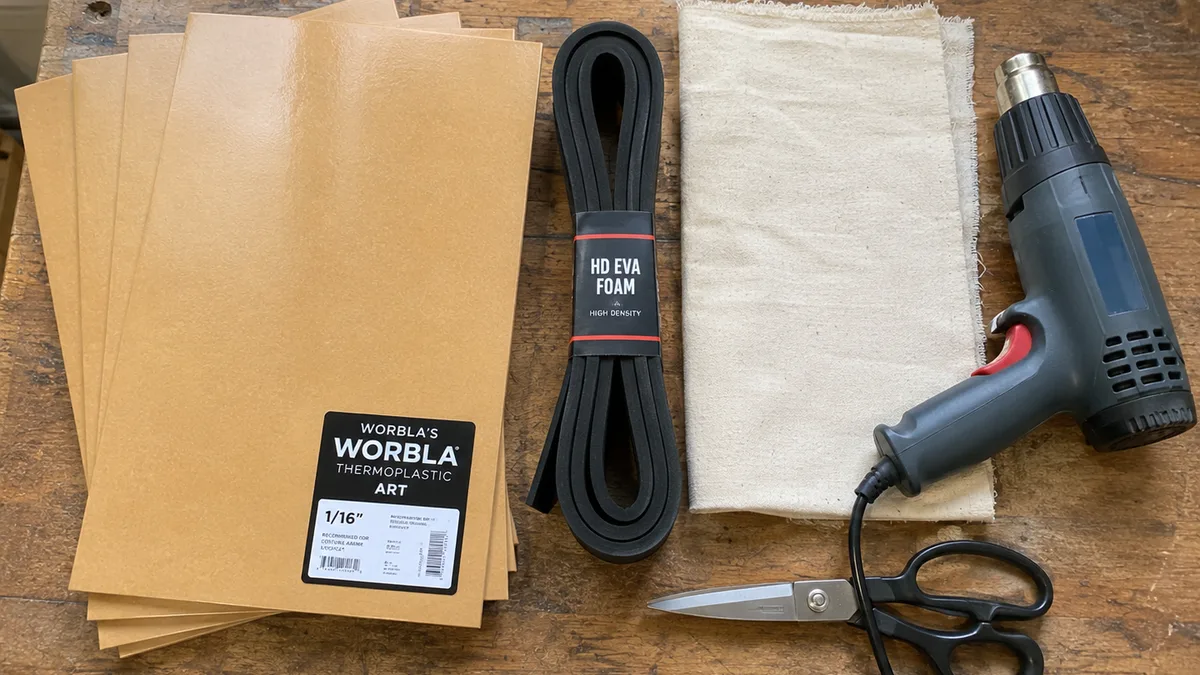
Add to the list: scissors or a craft knife, a heat gun, medium-grit sandpaper, and for the floating rivet a hole punch or a fine drill, a rivet or a metal eyelet, and a short piece of vinyl or silicone tubing matching the rivet's diameter.
Step 1 — Design the pivot point before cutting
The most common mistake is cutting the Worbla plates straight from the pattern and discovering the hinge on the fly. Designing the pivot point beforehand saves you from redoing pieces you've already activated.
- Make a cardboard or paper pattern of the whole piece (for example, the entire vambrace from elbow to wrist) and try it on.
- Mark the real pivot axis by flexing your arm or leg with the pattern on: the fold in the cardboard shows you exactly where the hinge should go.
- Leave a 5-8 mm gap between the two rigid parts at that point, so they don't collide at the maximum flex angle.
- Check the full range of motion with the cardboard pattern before cutting the final Worbla or EVA: if the cardboard wrinkles or tears when you move, the gap is too small.
Step 2 — Fabric-sandwich hinge over Worbla
This is the most versatile technique for elbows, knees and two-piece vambraces, because it becomes practically invisible once painted.
- Cut a strip of thick fabric (canvas, drill or fusible interfacing) about 4-5 cm wide, long enough to cover the whole width of the hinge plus a 2-3 cm overlap on each side onto the rigid plates.
- Heat only the overlap areas of the Worbla with the heat gun, to the usual activation temperature of 90 °C, without heating the central area that will stay exposed.
- Press the fabric onto the glossy side (the one with Worbla's integrated adhesive) at each end, leaving the middle section of the fabric completely free, not glued to the Worbla or to itself.
- Hold the pressure while it cools for about 30-60 seconds at each end before letting go.
- Test the movement before continuing to assemble the rest of the piece: the fabric should fold cleanly in the central zone without buckling against the Worbla.
Step 3 — EVA foam hinge for skin-contact areas
On the inside of an elbow or a knee, where the armour rubs directly against the skin, an EVA foam hinge is more comfortable than a fabric edge over Worbla, because the material cushions better and paints exactly like the rest of the piece.
- Use 2 mm FRC FOAM for the hinge strip: the thinner it is, the more it flexes without resistance.
- Glue only the ends of the thin EVA strip onto the rigid plates (Worbla or thicker EVA) with EVA Contact Pro: spread a thin coat on both surfaces, wait 15-20 minutes until tacky, and join with firm pressure.
- Leave the central area unglued, just like in the fabric hinge, so it's the part that absorbs the movement.
- Wait for full curing before putting the piece through intense movement: up to 48 hours for maximum bond strength.
Step 4 — Floating rivet with vinyl tubing
For articulated fingers, helmet jaws, or any point that needs a purely mechanical pivot rather than simple flexing, the floating rivet mimics a real door hinge.
- Drill an aligned hole through the two pieces that will pivot against each other, at the exact axis you marked on the cardboard pattern.
- Cut a piece of vinyl or silicone tubing a couple of millimetres longer than the combined thickness of both pieces: this tube acts as a spacer bushing.
- Pass the rivet or eyelet through the tube and both holes, so the rivet head presses against the tube and not directly against the Worbla or EVA.
- Close the rivet leaving some play: if it ends up too tight, the tube gets crushed and the piece stops rotating freely.
Important: the heat gun you use to activate Worbla reaches temperatures well above the material's 90 °C activation point. Always work at a safe distance from your skin and from any hinge you've already finished, because direct heat can deform the fabric or the EVA of a hinge you thought was done.
Reinforce the stress point with Worbla Meshed Art
Worbla's Meshed Art has a layer of recycled woven mesh on one side and a stronger integrated adhesive than Finest Art or Black Art, which is why the manufacturer itself recommends it for points under repeated mechanical stress such as a hinge.
You can use it in two ways: as the base material for the rigid ends of the hinge itself (instead of Finest or Black Art), or as a reinforcing patch glued on the hidden inner face of any of the three techniques above. In this second use, cut a rectangle of Meshed Art that covers both overlaps and about 2 cm of the flex zone, activate it at 80-90 °C and press it from inside the piece: the mesh stops the fabric or the EVA from tearing at the point that bears the most load after several hours of movement.
Tips to make it last the whole convention
Test the full range of motion before painting
Move around with the piece on, sit down, crouch and raise your arms above your head before applying any finish. A hinge that fails almost always does so on the very first flexes, and it's much easier to fix before there's paint on top.
Use flexible paint only on the hinge area
A rigid acrylic paint cracks under continuous movement even if the hinge itself works perfectly. Reserve a flexible, vinyl-type finish for the 2-3 cm of fabric or EVA that form the pivot zone, and the rest of the piece can carry whatever finish you prefer.
Bring an emergency repair kit to the convention
A small bottle of PERMABOND 2050 and a spare scrap of fabric or EVA solve a torn hinge in minutes between photo shoots, without having to go back to the hotel or home.
Store the armour without folding the hinge the same way every time
Always storing the piece folded along the same crease eventually creases and weakens the fabric or the EVA over time. Between conventions, keep the armour as flat and unfolded as possible.
Materials at Feroca
The full range of Worbla and EVA foam is available at Feroca, along with the adhesives from our cyanoacrylate adhesives for cosplay guide. If you're still deciding what materials to use for your next costume, also check our full cosplay materials guide and the article on how to make a cosplay helmet with EVA foam.
Frequently asked questions
Why does Worbla crack at the elbows and knees of an armour?
Because a continuous Worbla plate isn't designed to flex at a single point: all the stress of the movement concentrates on a very narrow line and the material ends up cracking there. The fix is to replace that line with a hinge made of fabric, thin EVA foam or a floating rivet, instead of trying to make the Worbla itself bend.
What fabric works for making a hinge in a Worbla armour?
A thick, non-stretch fabric, such as canvas, drill or fusible interfacing, works better than a thin or elastic weave, because you need it to fold in a controlled way rather than stretch. It's fixed at the ends to Worbla heated to 90 °C, using the material's own integrated adhesive, leaving the middle section free to act as the hinge.
Can I make a hinge using only EVA foam, without Worbla?
Yes. You can build the whole piece in EVA foam and use a strip of 2 mm FRC FOAM as the flex zone, gluing only the ends with EVA Contact Pro. It's the most comfortable option for areas in direct contact with the skin, such as the inside of the elbow.
How do I avoid burning myself with the heat gun when activating Worbla near the hinge?
The heat gun works at temperatures well above Worbla's 90 °C activation point, so it's best kept moving constantly rather than fixed on one spot, and worked at a safe distance from both your skin and any fabric or EVA areas you've already finished, since direct heat can deform them.
How long does a Worbla hinge last during a multi-day convention?
With a Worbla's Meshed Art reinforcement at the stress point and flexible paint over the flex zone, a well-built hinge easily lasts several days of convention under normal use. The most common failure point isn't the hinge itself, but a rigid finish applied on top without leaving room for flexibility.
What's the difference between a fabric hinge and a floating rivet?
A fabric hinge flexes continuously, like a fold, and becomes practically invisible once painted: it's the best option for elbows and knees. A floating rivet with vinyl tubing rotates like a real mechanical axle, with a specific pivot point instead of a fold, and suits articulated fingers or helmet jaws better, where you need a door-hinge type movement rather than continuous flexing.
Comments (0)