
Shopping Cart
- Feroca
- Epoxy Resins
- 0 likes
- 2244 views
- 0 comments
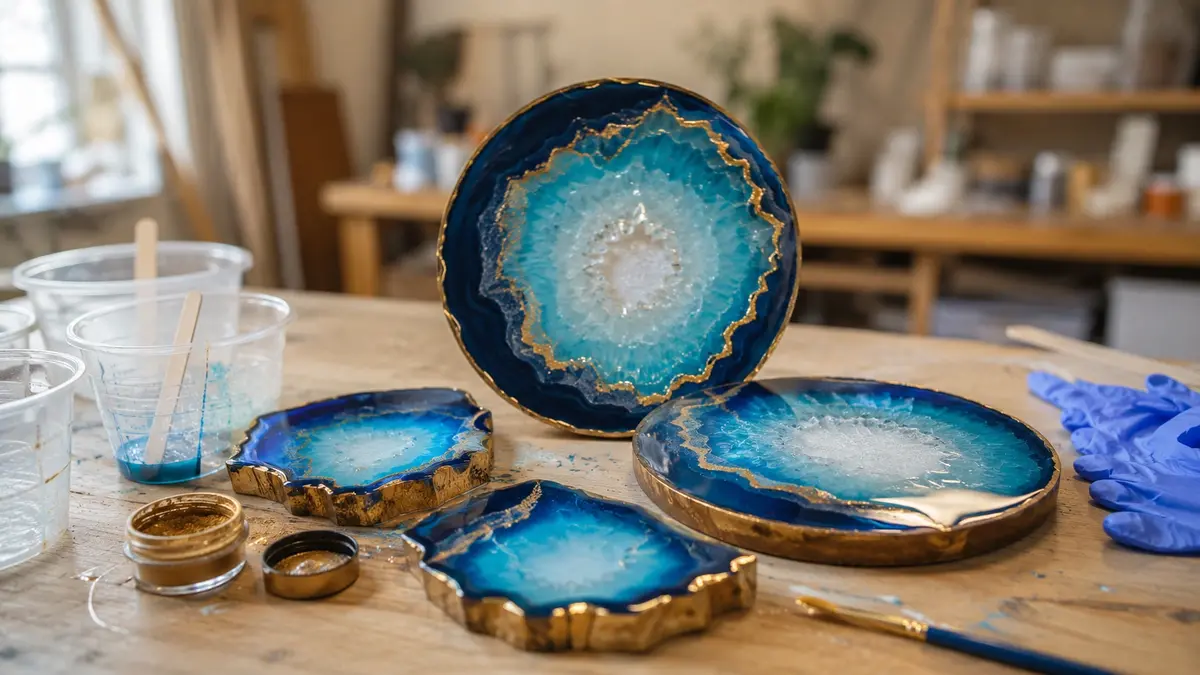
The geode effect is one of the most sought-after techniques in epoxy resin: layers of translucent colour that open towards a crystal interior, with a golden vein marking the fracture line between the outer "rock" and the inner "gem". The result mimics a real geode cut in half, and it's achieved with transparent epoxy resin and a few well-chosen pigments. In this guide we walk you through the process step by step.
What the geode effect is and why it works in resin
A real geode is a hollow rock lined with crystals that grew towards the centre of the cavity. The geode effect in resin imitates that structure with layers: a dark opaque base acting as the outer "rock", a series of translucent colour layers fanning out towards the interior, a metallic vein marking the line where the rock "broke", and a shiny centre imitating the crystal. Epoxy resin is perfect for this because, unlike other materials, it allows you to pour superimposed translucent layers without losing optical depth.
How it differs from other resin techniques
If you've already read our general guide on what you can make with epoxy resin, the geode effect is one of the most specific and multi-step techniques mentioned there: it's not a simple mould pour or an encapsulation, but a layered process with waiting times between each step. If you're more interested in making jewellery with epoxy resin (pendants, earrings, rings), that guide will be more straightforward for you; this one is designed for coasters, wall art or larger decorative pieces.
Materials you need
| Product | What it's used for |
|---|---|
| ClearWater Jewellery Epoxy | Small pieces: coasters, magnets, small-format artwork |
| ClearWater Deep Pour Epoxy | Large pieces or wood slabs with geode: supports up to 12 cm thickness in a single casting |
| Paste pigment | Dark opaque colour for the outer "rock" base |
| Piñata - Alcohol Inks | Translucent colour layers in a gradient towards the centre |
| Pearl Ex | Golden metallic vein at the fracture line and shimmer accents in the centre |
Add to your list: a silicone mould (round for coasters or irregular "slab" style), disposable mixing cups and sticks, fine brushes for the golden vein, nitrile gloves, and a lighter or kitchen torch to remove bubbles.
Step 1 — Prepare the mould and the "stone" base
- Mix the resin following the ratio on the packaging (100A:100B in the case of ClearWater Jewellery Epoxy) and tint a portion with black or dark grey paste pigment, at around 3% by weight, until you achieve a solid opaque colour.
- Pour this mixture to cover the entire mould with a thin layer, as if it were the complete outer rock of the geode.
- Allow it to partially gel without fully curing (between 1 and 2 hours at room temperature, depending on the resin). It should be tacky to the touch but not flowing: this halfway point is key for the next step.
Step 2 — Open the crystal cavity by tilting the mould
- Mix a new batch of resin without pigment, or with a very subtle translucent tint.
- Pour it onto a specific spot on the already-gelled dark layer, forming an irregular pool in the area where you want the cavity to open (typically covering 2/3 of the mould, leaving a "rock" border around it).
- Gently tilt the mould from side to side, letting the transparent resin spread over the semi-cured dark layer. Because the base is no longer fully liquid, the leading edge stays irregular and organic — like a real crack — rather than a perfect circle.
- Let it cure for a few minutes before continuing, so the irregular edge sets in place.
Step 3 — Apply the colour layers in a gradient
- Mix several small batches of transparent resin and tint each one with Piñata alcohol ink in different shades from the same colour family (for example, dark blue, mid blue and light blue, or purple, violet and lilac).
- Pour the darkest shade right at the edge of the cavity where it meets the outer rock, then work towards the centre with progressively lighter shades.
- Wait a few minutes between each colour so they don't fully blend together: you want distinct colour bands, not a blurred gradient.
Important: always work from the outside in. If you pour the centre first and then try to surround it with the darker layers, it's much harder to keep the bands clean and the effect loses precision.
Step 4 — Add the golden vein at the fracture line
- Mix a pinch of gold or bronze Pearl Ex with a drop of transparent resin until you get a fine metallic paste.
- Draw the vein with a fine brush right along the irregular line where the dark rock meets the first colour layer, following the organic contour that formed when you tilted the mould in step 2.
- Don't aim for a perfect line. The irregularities and small variations in thickness are what make the vein look like a real fracture rather than a drawn stroke.
Step 5 — Fill the interior with crystal texture
- Fill the centre of the cavity with unpigmented transparent resin, or with a very subtle hint of the lightest colour you already used.
- Dust a little Pearl Ex over the still-liquid surface, in small amounts and unevenly, to simulate the irregular shimmer of a cluster of crystals.
- Pass the lighter or kitchen torch very quickly over the entire surface to eliminate bubbles before the final layer starts to gel.
Step 6 — Cure, sand and seal
- Respect the full curing time of the final layer before demoulding (8–10 hours with jewellery resin, longer if you used Deep Pour for thick pieces).
- Sand the edges with progressive grits if the piece has flash or mould marks.
- If the piece will see frequent use (a coaster, for example), add a final thin layer of unpigmented transparent resin over the entire surface to unify the shine and protect the golden vein from wear.
Professional tips
Do a timing test before making the final piece
The exact "partial gel" point in step 1 varies depending on room temperature and the resin you're using. Prepare a small test sample to calibrate how long your resin needs before attempting it on the final piece.
Don't tilt the mould all at once
A sudden movement causes the transparent resin to spread too far and you lose the cavity effect. Tilt slowly, in small increments, checking the result between each movement.
Less metallic pigment is more
Too much Pearl Ex in the centre can saturate the effect and obscure the translucency of the colour layers underneath. Apply sparingly and in successive passes if you need more intensity.
Let each layer settle horizontally
Any tilt in the work surface between layers causes the colour to shift to one side before curing. Use a spirit level or wedges to ensure the mould stays perfectly horizontal at all times.
Materials at Feroca
The full range of transparent epoxy resins and resin pigments is available at Feroca. If you'd like to explore more ideas before deciding on your next project, take a look at our guide on what you can make with epoxy resin or the epoxy resin jewellery guide.
Frequently asked questions
What resin do I use for the geode effect?
For coasters or small pieces, ClearWater Jewellery Epoxy is plenty. For large pieces or wood slabs with a geode, ClearWater Deep Pour allows castings of up to 12 cm thick without needing so many layers.
How do I get the irregular shape of the crystal cavity?
By pouring the transparent resin over the dark base layer while it's still partially gelled (tacky but not flowing), and tilting the mould slowly from side to side. The leading edge of the resin stays irregular due to friction with the semi-cured layer, mimicking a real fracture.
How do I make the golden vein?
Mix a small amount of gold or bronze Pearl Ex powder pigment with a drop of transparent resin, then draw it with a fine brush right along the irregular line where the dark layer and the first colour layer meet.
Why are my colour layers blending together instead of staying as bands?
The most common cause is not leaving enough time between layers before pouring the next one. Let each colour rest for a few minutes and gain some body before adding the next shade, always working from the outside in.
Is the geode effect the same as a simple colour encapsulation?
No. An encapsulation is a single casting with a colour or object inside. The geode effect requires several layers applied at different stages of curing, with an opaque base, a cavity created by tilting and a metallic vein drawn by hand — making it a multi-step technique, not a single pour.
Comments (0)