
Shopping Cart
- Feroca
- Mold Making Silicones
- 0 likes
- 1499 views
- 0 comments
Concrete and decorative stone are hard, heavy and slightly abrasive materials: a soft silicone mould will take a fair number of casts, but it wears out quickly if what you want is to produce planters, panels, mouldings or architectural restoration elements in series. For that job, polyurethane rubber is the professional choice: far more wear-resistant, and it reproduces colour very accurately when you cast pigmented concrete. In this guide we explain how to make a polyurethane rubber mould step by step.
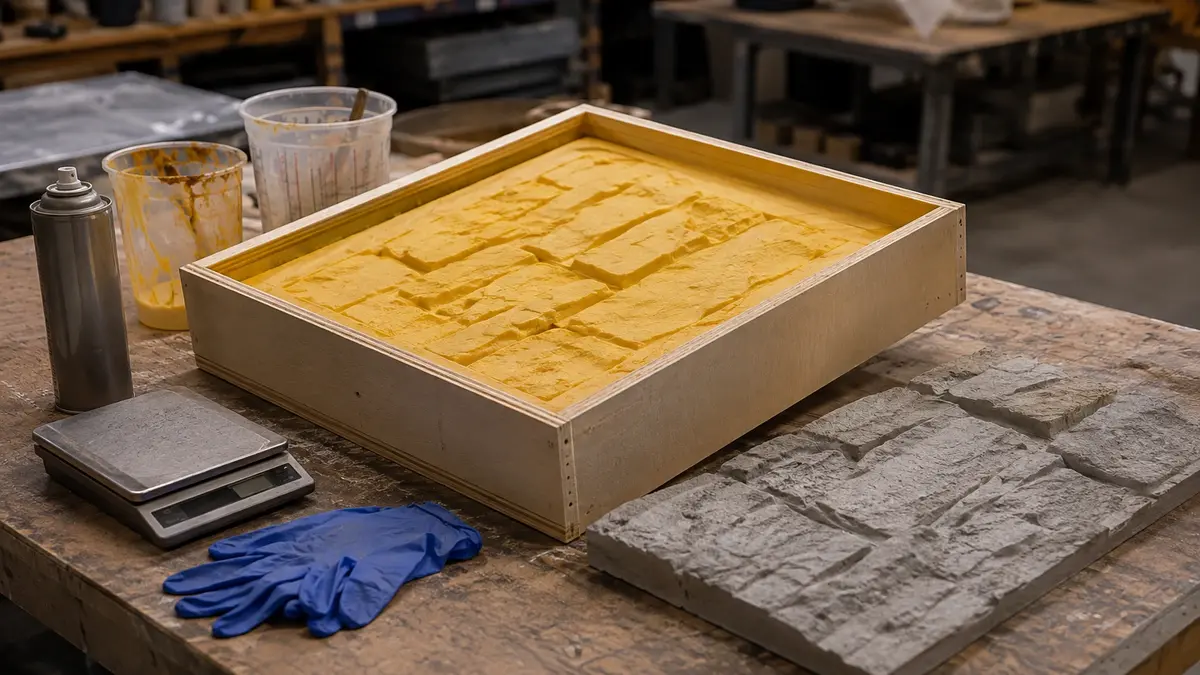
Why polyurethane and not silicone for concrete
A silicone mould reproduces detail with outstanding fidelity, but it is a soft material that wears down with the constant rubbing of fresh concrete, especially if the aggregate is somewhat coarse. Polyurethane rubber offers far higher tear and abrasion resistance, which translates into many more casts per mould before it starts to lose detail — key if you are going to produce several identical pieces, not just one.
Another practical advantage: if you work with pigmented or coloured concrete, polyurethane reproduces the colour accurately and uniformly in every piece.
Which hardness to choose
Feroca has three polyurethane rubbers designed specifically for concrete, stone and architectural restoration, with different Shore hardness:
| Product | Shore hardness | When to choose it |
|---|---|---|
| Poly 74-30 | A30 (soft) | Pieces with pronounced relief or small undercuts: the softer rubber flexes better so you can demould without breaking the detail |
| Poly 74-45 | A45 (medium) | General use: the balance between flexibility for demoulding and firmness to hold the shape |
| Poly 75-70 | A70 (firm) | Large pieces with simple geometry and hardly any undercuts: maximum resistance for producing many units |
Materials you need
| Product | What it is used for |
|---|---|
| Poly 74-30 / 74-45 / 75-70 | Polyurethane rubber for the mould, according to the hardness you need |
| Pol-Ease 2500 | Spray release agent, on the model before pouring the rubber and on the mould before casting concrete |
| 34D release agent | Wax alternative for rigid moulds, especially recommended for the first casts of a new mould |
Add to the list: melamine or wooden boards and sealing silicone (or industrial plasticine) to build the containment box, measuring cups and depressors for mixing, a scale, and nitrile gloves. To cast the concrete you will also need the materials of your usual mix (cement, aggregate, water and pigment if you use it).
Step 1 — Prepare the model and the release agent
- Clean the model of dust, grease or residue from previous work.
- Apply Pol-Ease 2500 in a thin, even coat over the whole surface of the model. Plaster and wax usually release from polyurethane without any release agent, but for almost any other material —including the concrete itself later on— it is necessary.
- Give it a few minutes for the release agent to settle before carrying on.
Step 2 — Build the containment box
- Build a box from melamine or wooden boards around the model, leaving a margin of at least 2-3 cm on all sides and above so the rubber has enough thickness.
- Seal all the joints of the box on the inside with sealing silicone or plasticine, so the liquid rubber cannot escape through any gap.
- Check the stability of the box before mixing anything: a leak halfway through pouring is much harder to fix than reinforcing the box beforehand.
Step 3 — Mix the polyurethane rubber
- Mix the two parts 1A:1B, equal parts by volume or weight, with no need for a precision scale.
- Stir thoroughly, scraping the walls and bottom of the container, where unmixed material tends to remain.
- Respect the working time of each product: 25-30 minutes for Poly 74-30, 30 minutes for Poly 74-45, 40 minutes for Poly 75-70.
Step 4 — Pour the rubber
- Pour from a fixed, low point, letting the rubber flow by gravity and cover the model little by little, instead of pouring it straight on top.
- Fill until the model is fully covered, with the thickness margin you left when building the box.
- Let it cure without moving the piece for the recommended 16 hours of demould time, at room temperature.
Step 5 — Demould
- Remove the containment box carefully once the 16 hours have passed.
- Separate the mould from the model slowly, taking advantage of the flexibility of the rubber in the areas with undercuts.
- Check the inside of the mould before using it: if you spot a surface bubble or an area that is not fully cured, it is better to find out now than halfway through a concrete cast.
Step 6 — Cast the concrete
- Apply Pol-Ease 2500 inside the mould before every cast: most concrete mixes do need a release agent, unlike plaster or wax. For the first casts of a new mould you can also use 34D release agent in paste form, applied in a thin coat and buffed once it has dried to a whitish haze.
- Pour the concrete (pigmented or not, depending on the finish you are after) following your usual vibrating or compacting process to minimise air bubbles in the final piece.
- Respect the setting time of the concrete before demoulding the piece — it is independent of the rubber's cure time, and normally longer.
Professional tips
Let the mould rest between casts
Although polyurethane takes many more casts than silicone, letting the mould recover its shape for a few minutes between pieces helps it keep its accuracy for longer.
Clean concrete residue off the mould
Dry concrete stuck inside the mould builds up unwanted texture on the next piece. Clean it with water and a soft brush between casts, without abrasive products that could damage the rubber.
Store the mould flat and away from light
Storing the mould folded or exposed to direct sunlight speeds up its ageing. Keep it laid out flat, in a cool place away from direct sunlight.
Test the colour of pigmented concrete on a small sample
The wet tone is not the final tone once it has set and dried. Make a small test with the same pigment dose before casting the whole piece.
Materials at Feroca
The whole range of polyurethane rubbers is available at Feroca. If your project needs maximum detail instead and not series production, take a look at our range of mould making silicones as well.
Frequently asked questions
Why use polyurethane rubber instead of silicone for concrete moulds?
Because polyurethane resists the abrasion of fresh concrete far better, which allows many more casts per mould before losing detail, and it reproduces colour accurately in pigmented concrete.
Which polyurethane rubber hardness should I choose for my mould?
For pieces with pronounced relief or undercuts, Poly 74-30 (Shore A30) flexes better when demoulding. For general use, Poly 74-45 (A45) is the balanced option. For large, simple pieces with intensive production, Poly 75-70 (A70) takes more casts.
Do I need a release agent to cast concrete in a polyurethane mould?
Yes, in most cases. Plaster and wax usually release without a release agent, but concrete and polyurethane resins normally do need one. A universal release agent such as Pol-Ease 2500 works well for this.
How long does a polyurethane mould for concrete last?
It depends on the care and the production volume, but the abrasion resistance of polyurethane allows many more casts than an equivalent silicone mould, as long as it is cleaned between uses and stored correctly.
Can pigmented concrete be used with these moulds?
Yes, and it is one of their most common applications: these polyurethane rubbers reproduce the colour of pigmented concrete accurately and uniformly in every piece.
Comments (0)