
Shopping Cart
- Feroca
- Epoxy Resins
- 0 likes
- 1936 views
- 0 comments
Pendants with encapsulated flowers, earrings with wave effects, and rings with crystal inclusions have become some of the most sought-after handmade jewellery pieces in recent months. Epoxy resin makes it possible: it's transparent, accepts pigments and inclusions, and with basic tools at home you can achieve a professional finish. In this guide we walk you through the main techniques for making jewellery with epoxy resin, from mixing to final polishing.
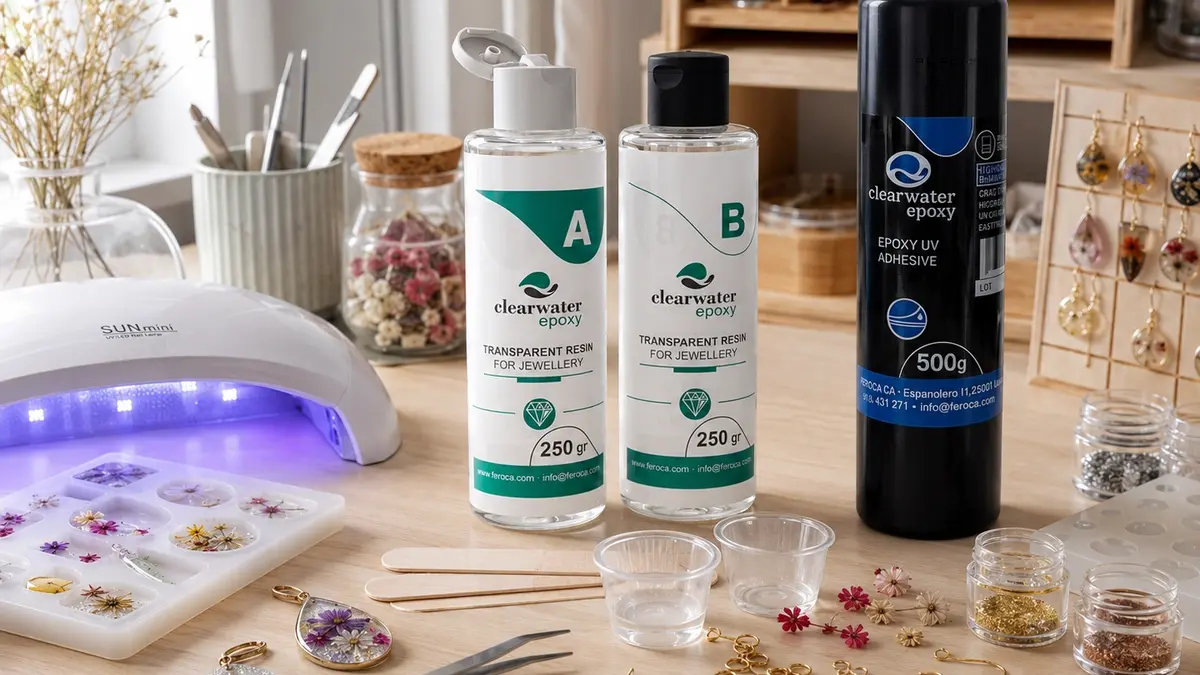
Which resin to choose depending on the piece
For jewellery, the choice of resin depends mainly on the size of the piece and whether you have time to mix and wait, or prefer to work faster.
| Resin | Format | When to choose it |
|---|---|---|
| ClearWater Epoxi para Joyería | Two components, mixed 100A:100B | Pendants, rings and bracelets in a mould: 30-minute working time, ideal for beginners |
| ClearWater UV Resin Adhesive | Single component, no mixing | Small pieces such as earrings or touch-ups: cures in minutes under UV light, with no wasted resin from over-mixing |
Materials you need
| Product | What it's used for |
|---|---|
| ClearWater Epoxi para Joyería | Base resin for moulds and encapsulation |
| ClearWater UV Resin Adhesive | Small pieces and touch-ups, no mixing required |
| UltraColor - Translucent Pigments | Vivid translucent colours, like stained glass |
| Piñata - Alcohol Inks | Wave, vein and marble effects |
| Paste pigment | Solid opaque colours |
| CRYSTAL CRUSH / CRYSTAL PEARLS | Crushed crystal or sphere inclusions for texture and sparkle |
| PolarShine | Polishing paste for the final finish after sanding |
Add to your list: disposable mixing cups and stir sticks, a small scale or measuring cups, nitrile gloves, silicone jewellery moulds in the size you need, a lighter or kitchen torch for removing bubbles, wet-and-dry sandpaper from 400 to 2000 grit, and jump rings, cords or metal findings depending on the piece you're assembling.
Step 1 — Prepare your workspace
- Work on a protected surface covered with plastic sheeting or baking paper: resin that drips outside the mould is almost impossible to remove once cured.
- Level the surface with a spirit level or shims if needed. A slightly tilted mould results in a piece that's thicker on one side than the other — something very noticeable in small pieces like earrings.
- Ventilate the room and put your gloves on before you start mixing, not after.
Step 2 — Mix the resin without mistakes
- Weigh the components separately rather than estimating by eye: ClearWater Epoxi para Joyería is mixed 100A:100B, in equal parts.
- Pour Part B into Part A in a clean cup and stir slowly for at least 3 minutes, scraping the sides and bottom of the cup thoroughly, where unmixed resin tends to collect.
- Work in small batches. With a 30-minute working time, it's better to prepare several small mixes for different pieces than one large batch that starts to thicken before you've finished pouring. If you only need to fill a tiny earring mould, consider using ClearWater UV Resin Adhesive instead: there's nothing to mix and no proportions to calculate for such a small amount.
Step 3 — Add pigment and create colour effects
- For a translucent, glass-like colour, add a few drops of UltraColor and stir well: the less you add, the lighter and more translucent the result.
- For a solid, opaque colour, use paste pigment at around 3% by weight. Mix it first with a small amount of resin, then gradually incorporate the rest.
- For a wave or marble effect (the classic wave-effect earring), pour the base resin — transparent or with a touch of blue — and, while the resin is still liquid, drop a few drops of Piñata alcohol ink in white and blue, then drag them gently with a toothpick to create veins, without blending them completely.
- For texture and sparkle, sprinkle CRYSTAL CRUSH or CRYSTAL PEARLS over the resin before it starts to gel.
Important: don't overdo the pigment. Too much — especially paste pigment — can affect the resin's cure and leave the piece tacky. Always add it gradually and check the result before continuing.
Step 4 — Pour or encapsulate
- For moulded pieces (pendants, rings, bracelets), pour the resin slowly from a low height, letting it flow rather than splashing in, to minimise bubbles introduced during pouring.
- To encapsulate dried flowers, photos or small objects, first pour a thin layer of resin, let it partially gel (10–15 minutes) so the object neither floats nor sinks completely, place it, then fill the mould with the remaining mix.
- If you plan to hang the piece, place the jump ring or metal finding in the mould before the resin fully cures, holding it with a clip if needed until the resin has gelled enough to keep it in place.
Step 5 — Remove the bubbles
- Pass a lighter or kitchen torch very quickly over the freshly poured surface, without pausing at any point: the heat breaks the surface tension of the bubbles and brings them up.
- Repeat the pass 1–2 minutes later, when new bubbles appear that didn't surface the first time.
- Don't hold the flame too close or keep it fixed on one spot: it can scorch the resin surface or, if you're working near alcohol-based pigments, cause a small flare-up.
Step 6 — Demould, sand and polish
- Respect the full cure time before demoulding (around 8–10 hours with the jewellery resin at room temperature).
- Sand wet progressively, starting at 400 grit and working up to 2000, to remove mould marks or flashing without scratching the surface.
- Finish with PolarShine applied with a soft cloth in circular movements, until the piece regains its transparent shine.
4 jewellery ideas to get you started
- Pendant with encapsulated dried flowers. Follow the encapsulation process in Step 4 using a small pendant mould, placing the jump ring before the resin fully cures.
- Wave-effect earrings. Pour resin with a touch of blue into an earring mould, add white ink veins using the technique in Step 3, and finish with a little CRYSTAL CRUSH near one edge to simulate sea foam.
- Ring with crystal inclusions. Fill a ring mould with transparent resin and sprinkle CRYSTAL PEARLS before it gels, for a frozen-bubbles effect inside the piece.
- Bracelet charm with an encapsulated object. Encapsulate a small photo or a piece of fabric in a tiny mould using ClearWater UV Resin Adhesive — ideal for a charm that cures in minutes with no mixing involved.
Professional tips
Always do a small test with a new pigment
The colour when wet is not the final colour: the resin may darken slightly as it cures. Mix a small sample and let it cure before applying that same shade to a large piece.
Store moulds clean and dry between uses
Cured resin residue on the mould walls from a previous use can break off and become visible inside the next piece. Wipe the mould with a cloth after each demoulding.
Control the room temperature
A sudden change in temperature during curing can cause the resin to catalyse unevenly. Always work in a room with a stable temperature, avoiding cold draughts blowing directly onto a freshly poured piece.
Don't use resin from an expired container
Epoxy resin has a limited shelf life once the container has been opened (around 3 months for the ClearWater range). Beyond that point, it may be harder to cure or remain tacky.
Materials at Feroca
The full range of transparent epoxy resins and resin pigments is available at Feroca. If you'd like a detailed look at the technical differences between all the products in the ClearWater Epoxi range, check out our complete ClearWater Epoxi guide.
Frequently asked questions
Which epoxy resin is best for starting out with jewellery making?
ClearWater Epoxi para Joyería is the best option for beginners: it's mixed in equal parts, has a 30-minute working time and a self-levelling finish that forgives small beginner mistakes.
How do I remove bubbles from the resin?
Pass a lighter or kitchen torch very quickly over the freshly poured surface, without pausing at any point. The heat breaks the surface tension of the bubbles and brings them up. Repeat the pass a couple of minutes later in case new bubbles appear.
How do I achieve a wave or water effect in a resin earring?
Pour the base resin with a touch of colour and drop a few drops of Piñata alcohol ink while the resin is still liquid, dragging them gently with a toothpick without blending them completely.
Which resin should I use for very small pieces, like a charm or an earring?
For tiny pieces, ClearWater UV Resin Adhesive is more practical than a two-component resin: there's nothing to mix and no proportions to calculate for such a small amount, and it cures in minutes with a UV torch.
Can I encapsulate dried flowers or photos in a resin jewellery piece?
Yes. First pour a thin layer of resin, let it gel for about 10–15 minutes so the object neither floats nor sinks completely, place it, then fill the mould with the remaining mix.
How long does an epoxy resin jewellery piece take to cure?
With ClearWater Epoxi para Joyería, around 8–10 hours at room temperature before demoulding. For small pieces in a hurry, ClearWater UV Resin Adhesive cures in minutes under ultraviolet light.
Comments (0)