Shopping Cart
- Feroca
- Cosplay
- 0 likes
- 13466 views
- 0 comments
EVA foam has become the go-to material for cosplayers of all skill levels. Lightweight, flexible, easy to cut, and heat-mouldable, it lets you build everything from a simple sword sheath to a full body armour without expensive tools or advanced technical knowledge. Whether you're just getting started in the world of cosplay or want to take your builds to the next level, this guide covers everything you need to know.
What is EVA foam and why do cosplayers use it?
EVA stands for ethylene-vinyl acetate, a thermoplastic copolymer that combines the lightness of foams with the strength and flexibility of synthetic polymers. In sheet form, it's what cosplayers simply call "foam" or EVA foam.
Its main advantages for cosplay are clear: minimal weight (a full armour weighs just a few kilos), easy to work with scissors or a craft knife, heat-mouldable without needing an oven, paintable with acrylics, and very affordable compared to other composite materials.
Types of EVA foam for cosplay: thicknesses and densities
Not all EVA foam is the same. The most critical parameter for cosplay is density, measured in kg/m³, which determines the rigidity, finish, and durability of your pieces.
FRC FOAM: high density for professional results
The FRC FOAM range from Feroca is formulated with a density of 156 kg/m³, well above the foam found in stationery shops or budget packaging rolls. This high density translates into: a smooth, pore-free surface that takes paint better, greater structural rigidity ideal for large pieces, cleaner cuts and edges, and better response to sanding and heat moulding.
FRC FOAM is available in three thicknesses:
| Thickness | Recommended use |
|---|---|
| 2 mm | Fine details, rivets, fillers, layered overlays |
| 5 mm | Medium pieces, shoulder guards, elbow guards, shin guards |
| 10 mm | Large structural pieces, armour bases, chest plates |
FRC FOAM is available in three colours: grey, black, and white. The base colour doesn't affect the final painted result, but black is preferred for dark armours that will have little paint applied, and white for pieces that will be painted in light colours.
Basic tools for working with EVA foam
You don't need a fully equipped workshop. With these basic tools you can carry out every step of the process:
- For cutting: craft knife with a fresh blade (essential — a dull blade tears the foam), metal ruler and cutting mat, scissors for small curves.
- For moulding: heat gun or hot air gun (200–300 °C), work gloves, curved reference surface (bowl, ball).
- For sanding and finishing: 120–220 grit sandpaper for rounding edges, rotary tool for details and textures.
- For gluing: contact adhesive specifically formulated for EVA foam.
How to cut EVA foam step by step
- Prepare your template: draw the piece on paper, cut it out, and trace the outline onto the EVA foam with a pen or marker.
- Cut with a craft knife: place the sheet on a cutting mat and make the cut in a single continuous motion, following the line with the metal ruler for straight edges.
- Curved cuts: use scissors or make several short cuts with the craft knife following the curve.
- Sand the edges: run 180-grit sandpaper along the edges to remove burrs and achieve a clean profile.
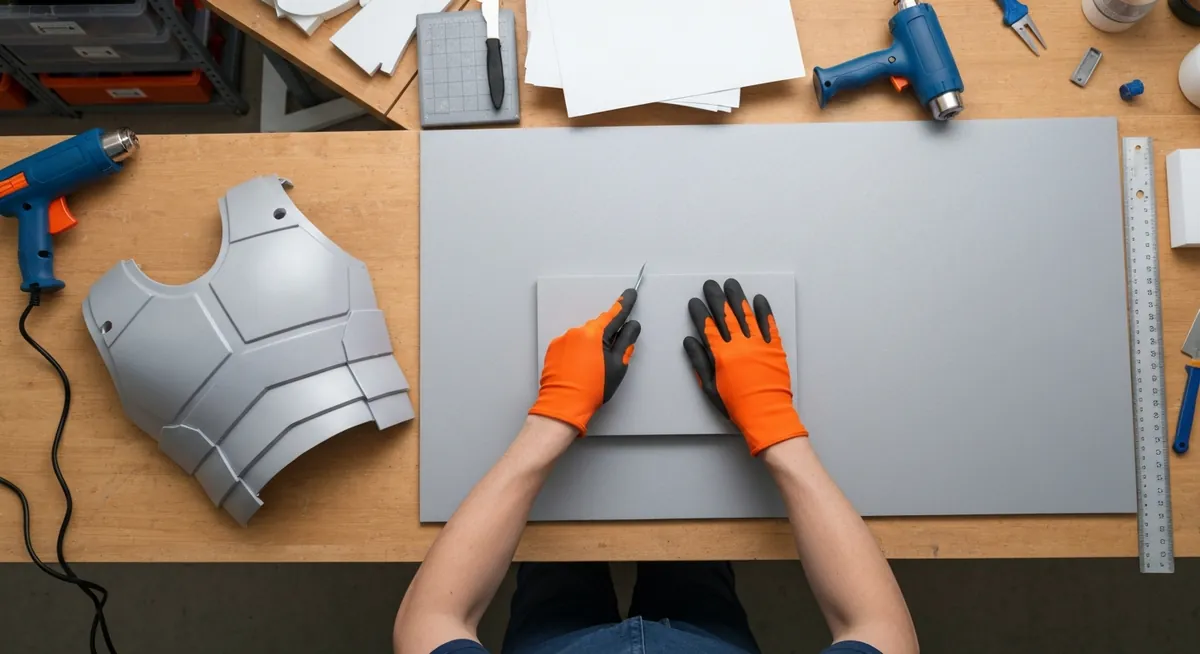
How to heat-mould EVA foam
Heat moulding is the technique that sets a professional cosplay apart from an amateur one. With heat, EVA foam softens and can be curved, stretched, and shaped into complex three-dimensional forms that would otherwise be impossible.
- Heat the piece: apply the heat gun at a distance of 5–10 cm, moving in circles. The EVA foam is ready when it changes colour slightly and gives way when bent without cracking.
- Shape quickly: you have between 10 and 20 seconds before it cools down. Shape it using a reference surface (a bowl for rounded pieces, a mannequin, or your own body with protection).
- Cool and set: hold the shape until the piece is fully cool again. You can speed up the process with cold water.
- Repeat if needed: if the shape isn't quite right, reheat and adjust.
Caution: heat guns and hot air guns reach temperatures that can cause burns. Wear work gloves and don't overheat the EVA foam — if it starts to bubble or emit smoke, you're applying too much heat.
How to glue EVA foam pieces together
Standard household adhesives (white glue, hot glue) don't work well with high-density EVA foam: either they don't bond properly or they create rigid joints that crack when bent.
EVA Contact Pro: the purpose-made adhesive
EVA Contact Pro is a contact adhesive specifically formulated for high-density EVA foam. It provides extra-strong, long-lasting adhesion, withstands temperatures up to 100 °C (it won't soften when using a heat gun near the joints), remains flexible after curing, and is toluene-free for safer use in semi-open spaces.
How to use it: clean and dry both surfaces, apply a thin, even coat to both sides of the joint, wait 15–25 minutes until the adhesive is tacky (not wet to the touch), press the pieces together and apply firm pressure. Allow to cure fully for 48 hours for maximum strength.
How to paint EVA foam: from primer to finish
Well-painted EVA foam can convincingly imitate leather, metal, wood, or any other material. The secret lies in surface preparation:
- Primer: apply Plasti-Dip in spray form or an acrylic primer for plastics. This creates a flexible base coat that accepts acrylics and prevents cracking.
- Base coat: apply 2–3 thin coats of acrylic paint, allowing each coat to dry fully. Flexible acrylics are the best choice.
- Weathering effects: apply a dark wash, let it partially dry, then rub with a dry cloth so it only remains in the recesses and details.
- Metallic effects: use metallic spray paints or acrylic paints with metallic pigment applied dry (dry brushing) over edges and raised details.
- Final varnish: apply a matte or satin varnish to protect the paint and achieve the final finish.
EVA AIR Foam Clay: for the details that make all the difference
EVA foam sheets are perfect for the main structure of an armour, but for fine details — filigree, gems, horns, elaborate grips — you need a hand-mouldable material. That's where EVA AIR Foam Clay comes in.
EVA AIR is a mouldable EVA foam paste that works like clay and air-dries in 24–48 hours while retaining the lightweight and flexible properties characteristic of EVA. You knead it with your hands, it can be pressed into silicone moulds for repeated pieces, it bonds directly to EVA foam sheets, and once dry it can be sanded, cut, and painted just like conventional EVA foam. Non-toxic and odourless, it's safe to use at home. Available in black, grey, and white, in 300 g containers.
Comparison table: FRC FOAM vs EVA AIR Foam Clay
| Feature | FRC FOAM (sheets) | EVA AIR Foam Clay |
|---|---|---|
| Format | Rolled sheet | Mouldable paste, 300 g |
| Density | 156 kg/m³ | Ultra-lightweight |
| Main use | Armour structure | Details and finishing |
| Tools | Craft knife, heat gun | Just your hands |
| Curing | Immediate (heat moulding) | 24–48 hours in air |
| Thicknesses | 2, 5, 10 mm | Free-form (mouldable) |
Common projects with EVA foam
Full armour sets
A complete EVA foam armour consists of a chest plate, back plate, shoulder guards, elbow guards, gauntlets, thigh guards, and greaves. The typical process is: create paper patterns, cut them in EVA foam (5–10 mm depending on the piece), heat-mould each piece, glue with EVA Contact Pro, add details with EVA AIR or 2 mm layers, then prime, paint, and varnish.
Props and weapons
Swords, spears, shields, and staves are excellent beginner projects. The core is usually made from card or PVC for rigidity, covered with 5 mm EVA foam for the finish. Sword blades use 10 mm EVA foam shaped with a rotary tool.
Masks and helmets
Masks are worked over a mould or directly on your own face with protection. 5 mm EVA foam is ideal: rigid enough to hold its shape yet flexible enough to fit the head comfortably.
Costume accessories
Collars, decorative shoulder pieces, belts, and harnesses are made with 2 or 5 mm EVA foam. The most practical closures for cosplay are magnetic snaps, which let you put on and take off the costume quickly without complicated stitching or buttons.
Frequently asked questions about EVA foam for cosplay
What's the difference between stationery EVA foam and high-density EVA foam?
Stationery EVA foam has a density of 20–40 kg/m³: it's very soft, porous, and tears easily. High-density EVA foam (such as FRC FOAM, 156 kg/m³) is far more rigid, has a smooth surface that takes paint much better, and holds up far longer under continuous use at events and conventions. High density is always recommended for cosplay.
At what temperature is EVA foam worked?
EVA foam softens between 60 and 80 °C and becomes easy to mould. A heat gun or hot air gun at 200–300 °C held 5–10 cm away is sufficient. At higher temperatures it starts to deform uncontrollably or bubble, so keep the gun moving constantly and don't expose the foam to direct heat for too long.
What primer is best for painting EVA foam?
Plasti-Dip in spray form is the most popular choice among cosplayers because it creates an elastic base coat that won't crack when the piece is bent. Acrylic primers for plastics also work well. Avoid solvent-based primers, as they can attack the foam.
Can EVA foam be sanded?
Yes. High-density EVA foam sands easily with 120–220 grit sandpaper. Sanding is useful for rounding edges, creating bevels, adding surface texture, or removing marks. Wear a dust mask while sanding to avoid inhaling foam particles.
How do you glue two pieces of EVA foam so they don't come apart?
A contact adhesive specifically formulated for EVA foam (such as EVA Contact Pro) is the best option. Apply to both surfaces, wait 15–25 minutes until tacky, then press together with firm pressure. Standard contact adhesives or hot glue don't deliver equally lasting results with high-density EVA foam.
How long does an EVA foam armour last?
With proper care (stored in a cool, dry place without being crushed), a well-built EVA foam armour can last for years. The most vulnerable points are the joints: if glued correctly with a purpose-made contact adhesive, they hold up perfectly well through use at events and conventions.
Can I combine EVA foam with resins or silicones?
Yes. A common technique is to create a silicone mould of a piece and then cast it in resin to obtain rigid, detailed copies. You can also glue resin pieces onto an EVA foam base. You can find out more about mould-making silicones and resins on our materials blog.
Comments (0)