Shopping Cart
- Feroca
- Fibreglass
- 0 likes
- 4098 views
- 0 comments
Have you noticed a pinhole leak in your Derbi's tank that's seeping and ruining the paintwork? Is the inside of your tank rusted and you want to protect it?
In this article we're going to show you an affordable way to fix it.
Materials for internal tank coating
This is a solvent that helps remove viscous residues from certain products, keeping the surface clean and ready to work on.
Kontakt 701 pure petroleum jelly spray is perfect for helping with demolding, and is also very useful as a lubricant and anti-corrosive agent. Its aerosol applicator ensures the surface is properly coated.
Depending on your needs, you can apply a thinner or thicker layer on your tank surface.

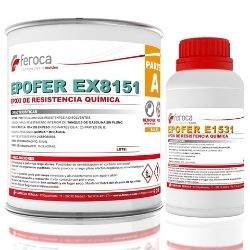
This resin is specifically used for solvent-resistant laminates. Primarily for the interior of unleaded petrol tanks.
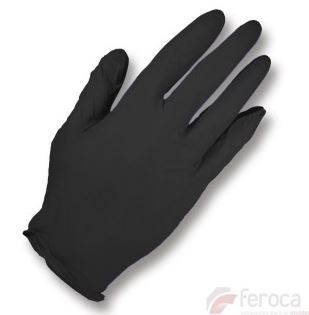
These are special gloves that do not inhibit silicone or resin. They are highly resistant and single-use. They adapt to the shape of both hands regardless of whether you are right- or left-handed.
These should always be considered as an essential protective measure.
-
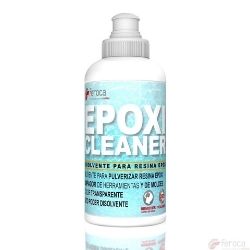
Resin cleaner and thinner, Epoxi Cleaner
This epoxy resin cleaner and thinner is perfect for cleaning tools and moulds, ensuring the tank finish is left in perfect condition.
Step-by-step guide to internal tank coating
Cleaning and preparing the tank
- The first thing you need to do is empty the tank and clean it thoroughly on the inside. This can be achieved with an industrial degreaser.
It is very important that no petrol residue is left inside, as applying the resin over it would act as a Release agent and prevent it from bonding to the tank.

- Once it is thoroughly clean, you need to check for rust. Metal tanks tend to develop rust, as lack of use and moisture cause this kind of deterioration. If any rust remains, remove as much of it as possible.
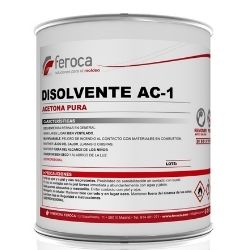
Our recommendation is to rinse the inside 2 or 3 times with acetone. To do this, pour the acetone inside along with some screws or nuts.
This will achieve two things: scratching the inside of the tank so the resin adheres better, and removing as much rust as possible.
We recommend counting the screws you put in, as one could get stuck inside and block a fuel inlet or outlet.
Some people use more homemade methods to clean tanks, such as vinegar or muriatic acid… Any of these work very well, but they may cause the tank to rust slightly.
Applying the products to coat a Derbi tank
Now that it is clean, we prepare it for the resin application.
- Using adhesive tape, cover all the inlet and outlet holes except for the fuel cap opening, which is where you will pour the resin.
If you like, you can apply a little petroleum jelly to the threads to prevent the resin from sticking to them. It is very important to do this immediately, before the tank starts to rust again upon contact with the air.
- Once everything is ready for casting, prepare the mixture. Epofer Ex8151 Resin is an epoxy resin with chemical resistance, meaning it will not be affected by the solvents in petrol.
The mixing ratio is 20%, so for every 100 grams of base or part "A", add 20 grams of hardener or part "B".
The quantities depending on tank capacity are as follows:
- 5 to 10 litres: 200A + 40B
- 10 to 20 litres: 400A + 80B
- 20 to 30 litres: 700A + 140B
- 30 to 40 litres: 1000A + 200B
- Mix thoroughly and, making sure the tank is completely dry, pour the mixture inside the tank.
This epoxy resin has a slow cure, so there is no rush. It has a working time of 90 minutes and a curing time of 24 hours.

- Once the mixture is inside, close the tank.
To prevent the cap from sticking, you can place a piece of cling film over the opening before closing it, preventing the resin from reaching the thread.
Drying process
- For approximately 90 minutes, keep rotating the tank. This will ensure the entire interior is evenly coated.
You don't need to rotate it continuously for the full 90 minutes.
Give it a couple of turns, leave it, come back after 5 minutes and turn it again… Repeat this throughout the 90 minutes.
It is very important that you don't always leave the tank in the same position, as the resin will settle in that position. Try resting it from different angles.
For this application we recommend wearing gloves — if any of this gets on your skin it can cause irritation and other skin problems.
If the resin spills or gets on your hands or tools, the best approach is to clean it with Epoxi Cleaner before it cures — this cleaner is specially formulated for epoxy resins.
Epofer Ex8151 resin cannot be dissolved once cured, so it must be cleaned up quickly.
- Once the 90 minutes are up, leave the tank to rest in the position closest to how it will be fitted in the vehicle.
- Remove the plugs and tape stops you had placed, and leave it for 24 to 48 hours to cure properly.
- If you notice any drips or excess material after removing the stops and tape, you can remove them with a craft knife or a stick — the resin will still be soft at this stage and will come off much more easily than when fully cured.
- Once everything is fully dry, you can fit it back on the vehicle and put it to use. If you like, you can give it a quick acetone rinse beforehand to check that everything is properly cured and nothing is left inside.

The best coating products at Feroca
Shop at our Feroca online store for everything you need to repair your tank like a professional.
Comments (0)